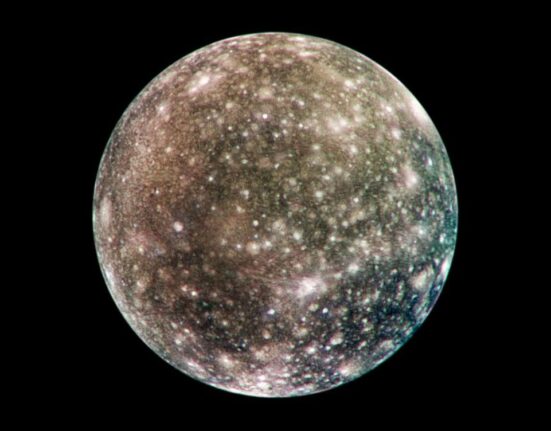
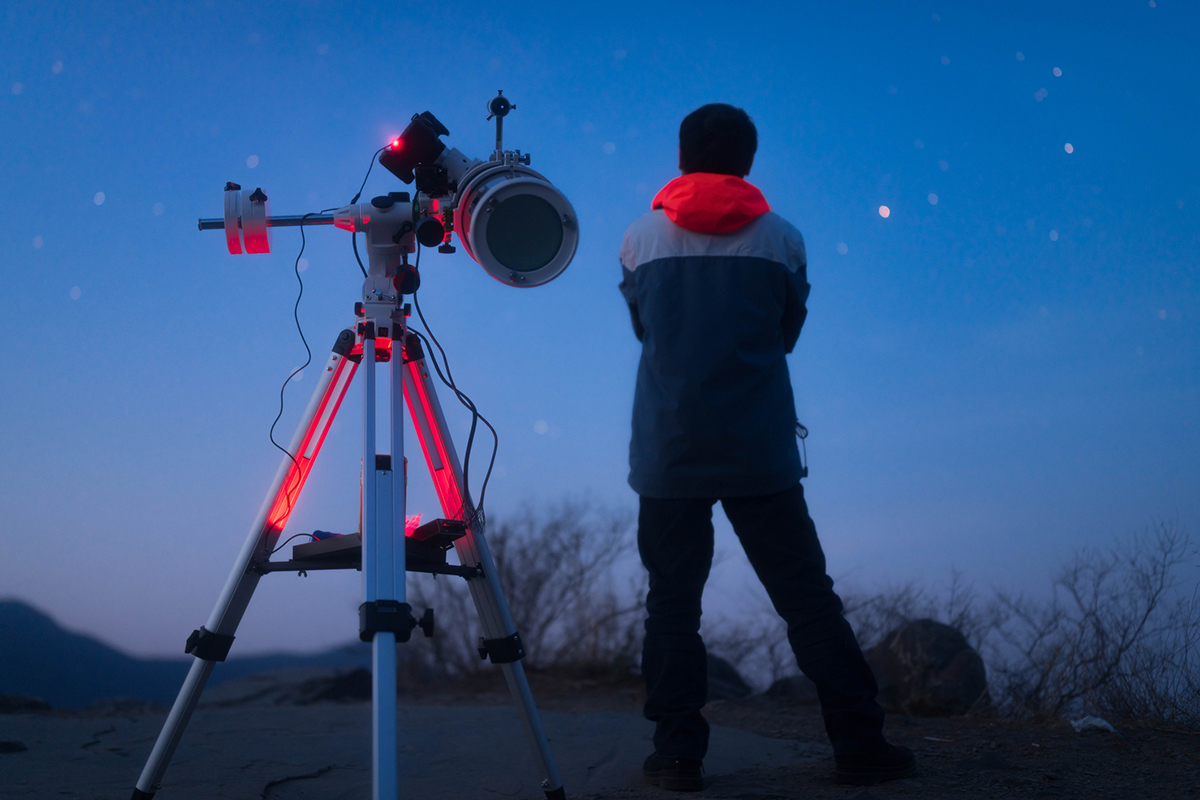
Using a telescope for astrophotography helped me capture my first detailed Moon images and sparked a deeper interest in astronomy.I quickly learned that patience, tracking accuracy, and clear skies make a huge difference in image quality.Each successful photo of planets and deep-sky objects felt like a rewarding achievement.
A telescope for astrophotography is designed to capture high-quality images of celestial objects in the night sky.It allows astronomers and hobbyists to photograph planets, stars, galaxies, and nebulae with impressive detail.
A telescope for astrophotography helps capture clear and detailed images of planets, stars, and galaxies. Discover 10 best telescopes for astrophotography, their features, and how to choose the right one.
1. Why the Telescope for Astrophotography Matters More Than Any Camera:

Here is what nobody tells you upfront: the sensor in your camera is almost irrelevant if the optical tube delivering light to it is mediocre. A $300 dedicated astronomy camera paired with a premium APO refractor will outperform a $2,000 mirrorless body mounted behind a department-store telescope for astrophotography every single time. The glass is the gatekeeper.
Focal ratio — the relationship between focal length and aperture — dictates how long you must expose a target to pull signal out of noise. A fast telescope for astrophotography, something in the f/5 to f/7 range, gathers light aggressively. Every time you double your aperture, you collect four times the photons in the same exposure window. This is not marginal. This is the difference between a five-minute sub-frame and a twenty-minute one to achieve identical signal depth.
Optical aberrations compound this. Chromatic aberration, coma, and field curvature each degrade different parts of the frame in different ways. A poorly corrected telescope for astrophotography introduces false color around bright stars, distorted star shapes toward the frame corners, and focal plane tilt that no amount of post-processing can fully fix. You cannot sharpen what was never sharp to begin with.
The mount carries the telescope, and mounts have their own payload ratings. Exceeding that rating — even slightly — introduces periodic error that shows up as trailed stars in exposures longer than thirty seconds. The telescope for astrophotography you choose must fit within the mount’s capacity with room left for your camera, focuser, guide scope, and cables.
Aperture also governs resolution. For planetary imaging specifically, a larger aperture telescope for astrophotography resolves finer atmospheric detail on Jupiter’s cloud bands or the Cassini Division in Saturn’s rings. For deep-sky objects, aperture gathers faint nebulosity that simply does not exist in shorter instruments.
2. The 5 Core Telescope Types You Must Know:

Every serious imager needs to understand the fundamental optical families before making any purchase. Here is the honest breakdown of each telescope for astrophotography category:
- Apochromatic Refractors (APO): The gold standard for wide-field deep-sky imaging. Near-perfect color correction, compact form factor, low maintenance. A quality telescope for astrophotography in this category starts around $800 and scales to $6,000+.
- Newtonian Reflectors: Excellent aperture-per-dollar ratio. A 6-inch f/5 Newtonian delivers serious light-gathering capability cheaply, but coma correctors are mandatory and collimation is a regular chore.
- Schmidt-Cassegrain Telescopes (SCT): Long focal lengths in compact tubes. Ideal for planetary imaging and smaller deep-sky objects. The f/10 default ratio is slow for faint nebulae, but focal reducers bring it to f/6.3 or f/7.
- Ritchey-Chrétien (RC) Telescopes: Two hyperbolic mirrors eliminate coma across a wide, flat field. Professional observatories use Ritchey-Chrétien designs. A telescope for astrophotography in this class is unforgiving of collimation errors but rewards patience with stunning results.
- Refractor-Reflector Hybrids (Cassegrain variants): Maksutov-Cassegrain and similar designs occupy a niche between portability and focal reach, suited primarily to planetary and lunar work rather than faint extended objects.
3. Aperture vs. Focal Ratio: The telescope for astrophotography Argument You Need to Win:
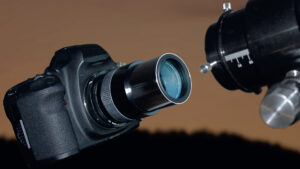
The aperture-versus-focal-ratio debate is the most misunderstood technical argument in amateur astrophotography. Getting this right determines which telescope for astrophotography belongs in your specific setup.
Aperture, focal ratio, and image scale interact in ways that are not immediately intuitive, and the decision cascades into every other gear choice you make afterward. A telescope for astrophotography with an 80mm aperture at f/6 has a focal length of 480mm. That same 80mm aperture at f/7.5 stretches to 600mm. The slower version produces a smaller image scale — more sky per pixel — which is useful for large targets like the Andromeda Galaxy or the Orion Nebula complex. The faster version gathers light quicker but covers a tighter patch of sky.
1: Understanding f/Ratio for Deep-Sky Imaging
Focal ratio directly controls the exposure time needed to reach a given signal-to-noise ratio on extended nebulae. An f/5 telescope for astrophotography requires one-quarter the exposure time of an f/10 system to accumulate identical sky background signal on a diffuse target. That math accelerates your imaging sessions dramatically — four times more frames per night, four times the data stacking depth.
2: Aperture’s Role in Planetary Resolution
Planetary imaging rewards aperture above almost everything else. The Dawes limit — approximately 116 divided by aperture in millimeters, expressed in arc-seconds — quantifies the finest detail a telescope for astrophotography can theoretically resolve. A 200mm aperture telescope resolves to 0.58 arc-seconds under perfect seeing. At that resolution, you are separating features on Mars that span roughly 300 kilometers. No amount of image sharpening software recovers detail that the aperture physically cannot resolve.
3: Matching Optical Speed to Camera Pixel Scale
Camera pixel scale, measured in arc-seconds per pixel, should match the resolution the telescope for astrophotography can deliver at your typical site’s atmospheric seeing. The formula is 206 multiplied by pixel size in microns, divided by focal length in millimeters. Most dark-sky sites in the continental US have median seeing between 2 and 3 arc-seconds. That means a telescope for astrophotography producing 1 arc-second per pixel is oversampling — you are spreading signals across more pixels than the atmosphere can fill with real detail.
4. Mount Selection: The Foundation Every Telescope for Astrophotography Needs:
The mount is not glamorous. Nobody posts mountain photos on Instagram. But ask any serious imager what single purchase changed their results most dramatically, and nine out of ten will name an equatorial mount upgrade:
- Equatorial Mounts (EQ): Track the sky’s apparent rotation by aligning one axis parallel to Earth’s rotational axis. Essential for any telescope for astrophotography used for deep-sky exposures longer than a few seconds.
- Alt-Azimuth Mounts: Move in altitude and azimuth. Fast, intuitive to use, poor for astrophotography unless equipped with field derotators. Not recommended for a dedicated telescope for astrophotography imaging rig.
- GoTo Systems: Computerized pointing systems that slew to any catalogued object. Saves time finding targets but adds weight and complexity. Worth the trade-off at any level above beginner.
- Payload Rating and Safety Factor: Never load a mount beyond 60% of its stated payload rating for imaging. A mount rated at 30 pounds should carry no more than 18 pounds of telescope for astrophotography hardware, camera, guide scope, and accessories.
- Periodic Error: Measured in arc-seconds, periodic error reflects the mechanical imperfections in the worm gear drive. Values below 10 arc-seconds peak-to-valley are acceptable. Below 5 arc-seconds is excellent for a telescope for astrophotography used for unguided short exposures.
5. Top Refractors for Deep-Sky Astrophotography:
Refractors dominate the entry and mid-range market for deep-sky telescopes for astrophotography work because they combine portability, low maintenance, and excellent optical correction in one package. Understanding what separates a mediocre refractor from an exceptional one takes about ten minutes of focused study.
The key differentiator is the glass itself. Standard crown-and-flint achromatic doublets produce secondary spectrum — residual chromatic aberration that rings bright stars in purple and red halos. Extra-low dispersion (ED) glass, often branded as FPL-53 or similar designations, virtually eliminates this. Any telescope for astrophotography marketed as a “true apochromat” using high-grade ED elements will demonstrate dramatically tighter star shapes across the full frame.
1: William Optics ZenithStar 73 APO
The William Optics ZenithStar 73 occupies a sweet spot in the market. At 73mm aperture and 430mm focal length (f/5.9), this telescope for astrophotography pairs naturally with full-frame and APS-C sensors. The FPL-53 doublet objective delivers star shapes that hold tight to the corner of a 44mm image circle when paired with the matching field flattener. Weight is approximately 2.7 pounds without accessories — light enough for compact travel mounts.
2: Askar FRA600 Quintuplet Astrograph
The Askar FRA600 is a 600mm f/5.6 quintuplet apochromat — five lens elements working in concert to produce a flat, corrected field without a separate flattener. This telescope for astrophotography handles sensors up to 50mm diagonal without measurable field curvature. The focuser is rack-and-pinion with a Crayford-style fine adjustment and carries camera loads up to roughly 5 kilograms without drawtube sag. It produces exceptional hydrogen-alpha narrowband results.
3: Sky-Watcher Esprit 100ED
The Sky-Watcher Esprit 100ED triplet APO is one of the best-value telescopes for astrophotography systems in the 100mm class. At 550mm focal length and f/5.5, it includes a dedicated field flattener-reducer in the box — a rare inclusion at this price tier. The focuser manages camera loads that would flex lesser designs. Resolution on this optical system reveals star-forming regions in the Carina Nebula with startling clarity in single sub-frames.
6. Reflectors and Catadioptric Systems for Serious Imagers:
For imagers who prioritize aperture over portability, reflectors and catadioptric systems open up focal lengths and apertures that no refractor at the same price can match. Understanding the trade-offs is essential before choosing this telescope for astrophotography.
Newtonians offer the lowest cost per millimeter of aperture in the entire telescope for the astrophotography market. A quality 8-inch f/6 Newtonian provides 203mm of light-gathering aperture at roughly 1200mm focal length. That optical formula images planetary detail that would require a $10,000 refractor to match. The trade-off is weight, tube length, and the constant need for collimation.
Schmidt-Cassegrain designs fold their optical path using mirrors, producing a long focal length instrument in a short tube. The Celestron EdgeHD series addresses the SCT’s traditional field-curvature problem with a modified optical design that flattens the focal plane. A Celestron EdgeHD 11″ at 2800mm focal length is a telescope for astrophotography that images galaxy clusters with resolution comparable to professional observatory instruments from a dark backyard.
- Baader MPCC Coma Corrector: Mandatory for Newtonian telescope for astrophotography imaging. Eliminates the wing-shaped coma distortion that afflicts stars near the edge of the field. Approximately $140. No Newtonian user should image without one.
- Focal Reducers for SCTs: Celestron’s f/6.3 reducer drops the EdgeHD from f/10 to f/6.3, cutting exposure times by 2.5x. Transforms a slow planetary instrument into a capable deep-sky telescope for astrophotography.
Telescope for Astrophotography Comparison Table:
| Telescope Model | Aperture | Focal Length | Focal Ratio | Optical Design | Best Use Case | Price Range | Field Flatness | Weight (OTA) |
| William Optics ZenithStar 73 | 73mm | 430mm | f/5.9 | ED Doublet APO | Wide-field DSO | $500–$650 | Good (with flattener) | 2.7 lbs |
| Askar FRA600 | 107mm | 600mm | f/5.6 | Quintuplet APO | Wide/mid DSO | $1,100–$1,400 | Excellent (built-in) | 8.2 lbs |
| Sky-Watcher Esprit 100ED | 100mm | 550mm | f/5.5 | Triplet APO | Wide-field DSO | $1,200–$1,600 | Excellent (included) | 9.5 lbs |
| Celestron EdgeHD 8″ | 203mm | 2032mm | f/10 | SCT Aplanatic | Galaxy/Planetary | $1,600–$2,000 | Excellent | 13.5 lbs |
| GSO 8″ f/6 Newtonian | 203mm | 1200mm | f/6 | Newtonian Reflector | Nebulae/Clusters | $350–$550 | Moderate (with MPCC) | 17 lbs |
| Orion 10″ f/4.7 Astrograph | 254mm | 1200mm | f/4.7 | Fast Newtonian | Faint DSO | $700–$900 | Good (with coma corrector) | 22 lbs |
| Planewave CDK14 | 356mm | 2563mm | f/7.2 | CDK Astrograph | Professional DSO | $15,000+ | Exceptional | 75 lbs |
| Takahashi FSQ-106EDX | 106mm | 530mm | f/5 | Quadruplet APO | Wide-field DSO | $5,500–$6,500 | Exceptional | 13.2 lbs |
| Meade LX90 8″ ACF | 203mm | 2032mm | f/10 | ACF (flat-field SCT) | Galaxy/Planetary | $1,400–$1,800 | Good | 14 lbs |
| Vixen SD103S | 103mm | 795mm | f/7.7 | SD Doublet APO | Wide/mid DSO | $2,000–$2,600 | Good (with flattener) | 8.4 lbs |
7. Guiding Systems and Their Critical Role in Long Exposures:
No telescope for astrophotography delivers its potential without a properly configured autoguiding system. This is the second-biggest mistake new astrophotographers make — they invest in glass and skip the guide system.
Autoguiding uses a secondary optical system — a guide scope or an off-axis guider — to monitor a star in real time and send correction signals to the mount’s stepper motors. Without this, a telescope for astrophotography on even the best mount will produce slightly trailed stars in exposures beyond ninety seconds, depending on the polar alignment quality and the mount’s periodic error profile.
1: Guide Scope vs. Off-Axis Guider
A guide scope is a small, separate optical tube mounted piggyback on the main telescope for astrophotography optical tube assembly. Common choices include the ZWO 60mm f/4 guide scope at roughly $130. It works well for focal lengths below 1000mm. Above that, flexure between the guide scope and the main tube introduces differential movement that the guiding algorithm cannot correct — you guide perfectly on the guide star while the main telescope for astrophotography drifts independently.
2: PHD2 Guiding Software Configuration
PHD2 (Push Here Dummy, version 2) is the industry-standard free autoguiding software. Calibrating PHD2 correctly for your specific telescope for astrophotography and mount combination takes roughly thirty minutes the first time. The backlash compensation and hysteresis settings matter enormously. An over-aggressive guiding algorithm chases seeing, making corrections faster than the mount can respond, which introduces oscillation. Set the aggressiveness to 60–70% for most equatorial mounts.
3: Off-Axis Guider Advantages for Long Focal Lengths
An off-axis guider (OAG) picks off light from the main telescope for astrophotography using a small prism positioned just in front of the camera sensor. Because the guide camera is sampling the same optical path as the imaging camera, flexure disappears entirely. At focal lengths above 1000mm — where differential flexure with a guide scope becomes a real problem — the OAG is the correct solution for a telescope for astrophotography systems designed for serious long-focal-length imaging.
8. Cameras That Pair Best With a Telescope for Astrophotography:
The camera discussion is almost as contentious as the telescope for astrophotography selection itself. Three categories dominate the field:
- Dedicated Astronomy CMOS Cameras: ZWO ASI, Player One, and QHY sensors purpose-built for astronomical imaging. Cooled variants drop the sensor temperature 35–40°C below ambient, slashing thermal noise dramatically. The ZWO ASI2600MM Pro is the current benchmark telescope for astrophotography cameras in this class.
- Mirrorless and DSLR Cameras: Canon and Sony mirrorless bodies work excellently with a telescope for astrophotography. Astro-modified versions remove the internal IR-cut filter, allowing hydrogen-alpha light (656nm) to reach the sensor at full sensitivity — typically a 3–4x improvement for emission nebulae.
- Planetary Cameras: Small sensor, high frame-rate cameras that capture thousands of short exposures for lucky-imaging stacking on planets. ZWO ASI planetary cameras with 1/3″ sensors pair perfectly with long focal length telescopes for astrophotography systems.
- Sensor Size and Image Circle: Larger sensors require a larger image circle from the telescope for astrophotography. Full-frame sensors need at least 43mm of flat, corrected field. Many budget APOs only cover 22mm adequately.
- Read Noise: Measured in electrons, read noise determines how short your minimum useful exposure can be. Below 2e- read noise enables sky-limited imaging in 60-second subs from a moderately light-polluted site.
9. Narrowband Imaging: When a Telescope for Astrophotography Unlocks the Invisible Universe
Narrowband imaging uses filters that transmit only specific emission lines — hydrogen-alpha at 656nm, oxygen-III at 501nm, sulfur-II at 672nm — to capture nebulae that are essentially invisible in broadband light. This technique transforms a telescope for astrophotography used in the suburbs into a powerful research-grade imaging system.
Light pollution primarily affects broadband wavelengths. A 3nm hydrogen-alpha filter reduces the sky background by a factor of roughly 100 compared to a broadband luminance filter. That means you can image from a Bortle 7 or Bortle 8 sky — practically the middle of a city — and produce images competitive with data collected from dark sites using a telescope for astrophotography with appropriate narrowband capability.
1: Choosing the Right Filter Bandwidth
Filter bandwidth — 3nm, 5nm, or 7nm — controls how much of the emission line signal passes through alongside the sky background. Narrower filters reject more sky glow but require longer integration times. A 3nm Ha filter on a telescope for astrophotography operating at f/7 typically needs 10–15 minute sub-exposures to reach a useful signal-to-noise ratio. At f/5, you can cut that to 5–8 minutes.
2: Integrating Narrowband with Broadband Data
The most compelling telescope for astrophotography narrowband work combines Ha, OIII, and SII data into an SHO (Hubble palette) composition or blends narrowband hydrogen-alpha data into RGB broadband images to add nebulosity structure. The HOO palette — Ha to red, OIII to both green and blue — produces natural-looking colors for emission nebulae that approximate what a human eye would theoretically see if sensitive enough.
3: Dual-Narrowband Filters for Fast Optics
Dual-narrowband filters like the Optolong L-eXtreme or IDAS NBZ transmit both Ha and OIII simultaneously to a color camera. They work with unmodified DSLRs and color CMOS cameras on a telescope for astrophotography. A single 5-minute sub through a dual-narrowband filter from a suburban site contains more nebulae than thirty minutes of broadband exposure. The trade-off is blended color data that requires specific processing workflows in PixInsight or Astro Pixel Processor.
10. Software Stack for Processing Telescope for Astrophotography Data:
Data acquisition is half the work. Processing transforms raw calibrated frames into a finished image, and the software choices matter as much as the telescope for astrophotography hardware decisions that preceded them.
PixInsight is the professional standard. Its processing modules — ScreenTransferFunction, DynamicBackgroundExtraction, NoiseXTerminator, BlurXTerminator — address every stage of the processing pipeline with mathematical precision. The learning curve is steep, measured in weeks, not hours. But the ceiling is effectively unlimited. Every major award-winning astrophotograph in the last decade was processed in PixInsight.
Astro Pixel Processor (APP) competes directly in the stacking and integration phase. Its multi-band gradient removal and star alignment engine handles datasets from a telescope for astrophotography more gracefully than PixInsight’s ImageIntegration module for some users. Many images stack in APP and finish in PixInsight.
Siril is free, open-source, and entirely capable. For a beginner telescope for astrophotography user not ready to invest $300 in PixInsight, Siril provides calibration, stacking, and basic processing tools that produce genuinely competitive results.
The calibration workflow — bias frames, dark frames, and flat frames — removes sensor and optical artifacts before integration. Flat frames, captured against an evenly illuminated panel or twilight sky, correct the vignetting pattern unique to every telescope for astrophotography and focuser combination. Skip flats, and your stacked image will show a dark gradient toward the corners that no gradient removal tool can fully eliminate.
11. Common Mistakes That Ruin a Telescope for Astrophotography Setup:
This list comes from direct observation, not theory. These are the errors made repeatedly in online forums, at star parties, and by experienced imagers who should know better.
The biggest single error is under-mounting. A $1,500 telescope for an astrophotography optical tube on a $200 mount is a disaster. The mount is the foundation. Invest proportionally — the mount should represent at least 40–50% of the total system cost in a serious telescope for astrophotography rig.
Second: ignoring polar alignment. A mount polar-aligned to within 3 arc-minutes of the celestial pole via drift alignment or SharpCap’s polar alignment tool virtually eliminates field rotation in exposures below ten minutes. Polar alignment takes fifteen minutes. Skipping it costs you hours of data.
Third: imaging through poor atmospheric transparency. When the atmosphere contains humidity, smoke, or dust, even the finest telescope for astrophotography produces soft, contrast-reduced images. Transparency apps like Astrospheric or Clear Outside provide hourly forecasts. Wait for the five-star nights.
Fourth: cooling the camera without cooling the optics. Dew formation on the front lens element of a telescope for astrophotography ruins an imaging session instantly. A dew heater strap — a resistive heater strip wrapped around the objective — prevents condensation for under $30.
Fifth: chasing complexity before mastering basics. A beginner telescope for astrophotography users who cannot polar-align reliably should not be operating a motorized focuser, an automated filter wheel, and a guiding system simultaneously. Master one system at a time.
12. Building a Scalable Telescope for Astrophotography System Over Time:
The most sustainable approach to building a telescope for astrophotography is modular acquisition. Buy the mount first — buy the best mount your budget allows, because it will outlast multiple optical tube upgrades. A Celestron CGX, iOptron CEM70G, or Sky-Watcher EQ6-R Pro represents a platform you will still be using in ten years regardless of what telescope for astrophotography optics mount on top of it.
Start imaging with a modest, fast refractor — something in the 60–80mm aperture range at f/5 to f/7. A telescope for astrophotography like the William Optics RedCat 51 or the Askar ACL200 delivers images that would have been considered professional-grade just fifteen years ago. You will learn polar alignment, guiding calibration, flat-frame acquisition, and stacking workflow without the additional complications of collimation, dew management on large mirrors, and heavy payload management.
Then scale. Add a 100mm triplet APO for tighter compositions. Later, step into a dedicated narrowband filter system. Eventually, if the obsession deepens — and it almost always does — the large-aperture Ritchey-Chrétien or Planewave CDK astrograph becomes the logical endpoint of a telescope for astrophotography journey that started with a small, fast, forgiving refractor on a solid equatorial mount.
The telescope for astrophotography journey is nonlinear. You will revisit choices, reconsider focal lengths, and discover that some of your finest images come from modest equipment on exceptional nights. The night sky does not care how expensive your gear is. But it rewards the imager who understands their telescope for the astrophotography system deeply enough to extract everything it can give.
FAQ’s:
Q1: What is the best telescope for astrophotography for a complete beginner?
A compact ED refractor like the William Optics ZenithStar 73 on a Sky-Watcher Star Adventurer mount is the ideal starting point.
Q2: Do I need a tracking mount for a telescope for astrophotography?
Yes — any exposure longer than 20–30 seconds requires an equatorial tracking mount to prevent star trailing.
Q3: Can I use a regular DSLR with a telescope for astrophotography?
Absolutely, and an astro-modified DSLR dramatically increases sensitivity to emission nebulae compared to a stock camera.
Q4: How important is focal ratio for a telescope for astrophotography used on faint nebulae?
Extremely important — an f/5 system gathers light four times faster than an f/10 system on extended objects.
Q5: Is a telescope for astrophotography useful under light-polluted skies?
Yes — with narrowband filters, a telescope for astrophotography produces exceptional nebula images even from Bortle 7–8 suburban locations.
Conclusion:
The right telescope for astrophotography decisions rests on three pillars: matching aperture and focal ratio to your targets, mounting the optical tube on a platform capable of supporting it, and building your system modularly over time. Start with a fast APO refractor on a quality equatorial mount, master your guiding and calibration workflow, and scale deliberately. The cosmos rewards patience and precision.