Using a telescope dob for the first time was an exciting experience because it was easy to set up and use.I enjoyed observing the Moon’s craters and distant planets with its clear and bright views.The smooth movement of the telescope made stargazing both comfortable and enjoyable.
A telescope dob is a popular reflector telescope known for its simple design and powerful viewing capabilities It offers excellent value for beginners and experienced astronomers who want clear views of deep-sky objects.
The telescope dob is a popular Dobsonian telescope known for its simple design, large aperture, and excellent performance for beginners and amateur astronomers. Learn 10 key reasons why it is widely used.
1. What Exactly Is a Telescope Dob and Why Does It Dominate Visual Astronomy:
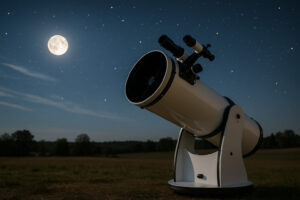
A telescope dob — short for Dobsonian telescope — is a Newtonian reflector mounted on a simple alt-azimuth rocker box. The design was popularized by amateur astronomer John Dobson in the 1960s and 1970s. His core philosophy was radical for its time: build the largest possible aperture at the lowest possible cost and mount it in a way that anyone could use without an engineering degree.
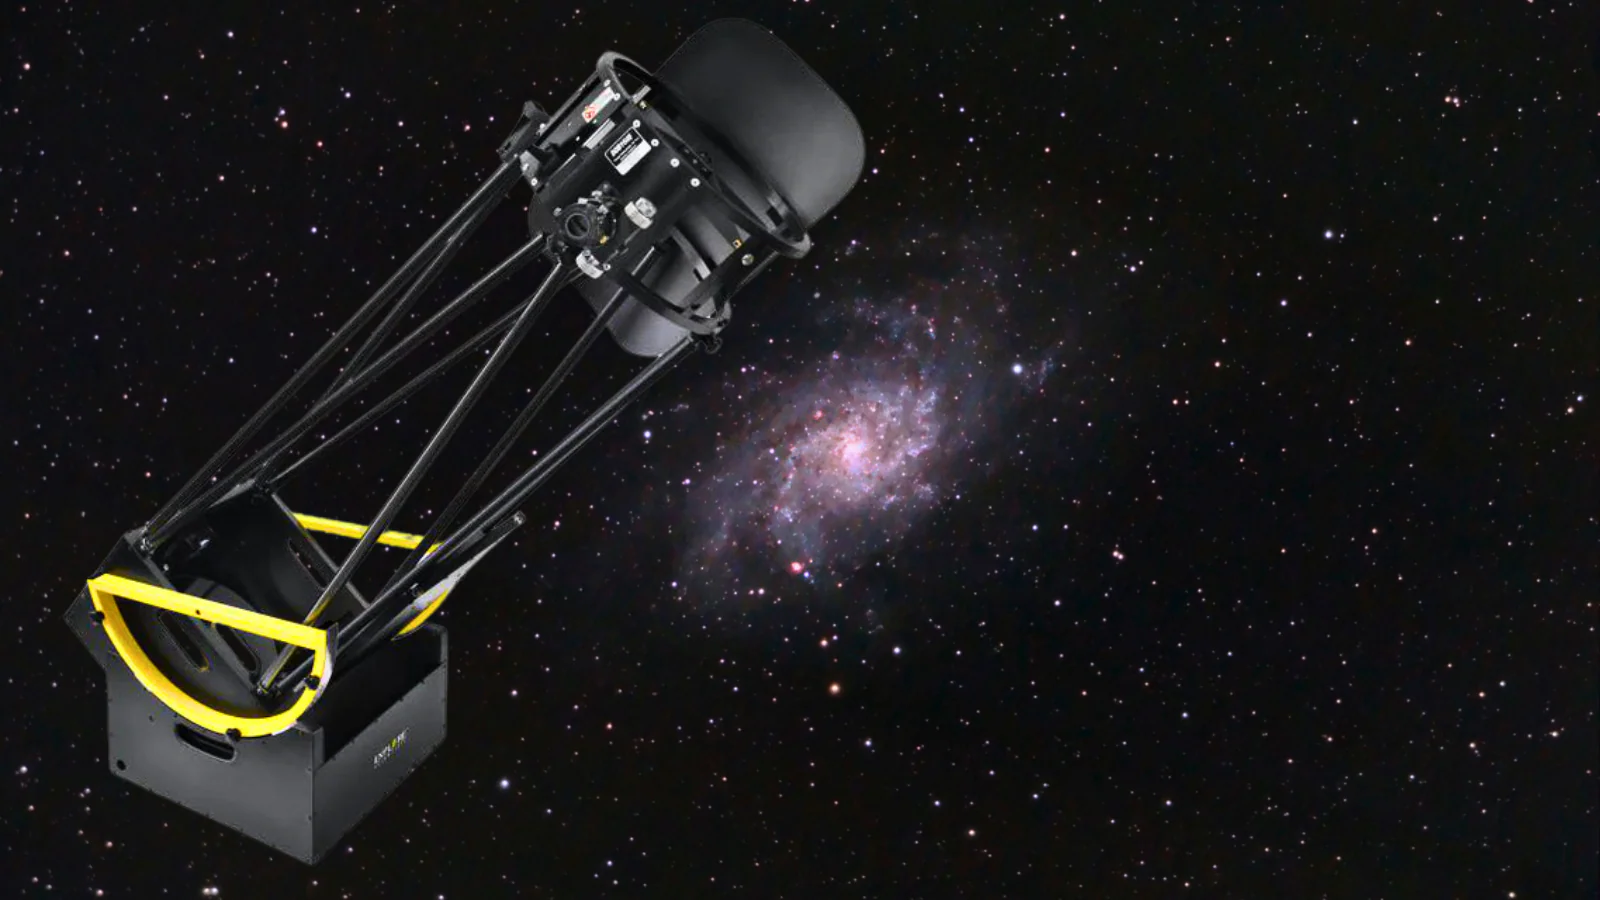
The optical tube is a Newtonian reflector, meaning it uses a large primary mirror at the bottom to gather light and a smaller flat secondary mirror near the top to redirect that light to the eyepiece on the side. What makes a telescope distinct from other Newtonians is the mount. The rocker box sits on a ground board with three points of contact (often Teflon pads riding on laminate) and pivots smoothly in azimuth while the tube rocks up and down in altitude. No counterweights. No polar alignment. No electronic tracking required at basic entry level.
The result is a mount that trades the precision of an equatorial for raw simplicity, and for visual observing of deep-sky objects — galaxies, nebulae, star clusters — the tradeoff is almost always worth it. When you have a telescope with a 10-inch mirror, you’re gathering roughly four times the light of a popular 5-inch refractor that costs three times as much.
2. The 5 Core Advantages That Make a Telescope Dob the Smart Buyer’s Choice:

When budget-to-performance ratio matters — and it always does — nothing on the market beats a well-made telescope . Here’s exactly why experienced observers keep coming back to this design:
- Aperture per dollar is unmatched: A quality 10-inch telescope typically retails for $600–$900. A 10-inch apochromatic refractor of comparable optical quality would cost north of $15,000.
- No collimation nightmare (when set up correctly): A well-assembled telescope dob holds collimation longer than most people expect, and re-collimating takes under three minutes with a Cheshire eyepiece once you’ve done it twice.
- Instant cool-down advantage: Open-tube Newtonians thermally equilibrate faster than sealed-tube designs, which means your telescope is ready to deliver sharp images within 20–40 minutes of taking it outside on most nights.
- Kids and beginners can actually use it: The push-to motion of a telescope is intuitive. There’s no handbox, no meridian flip, no software interface between the observer and the universe.
- Portability in larger apertures: An 8-inch solid-tube telescope breaks down into two manageable pieces — rocker box and tube — that fit in most car trunks, something impossible with an equivalent equatorial Newtonian setup.
3. Choosing the Right Aperture for Your Telescope Dob: A Systematic Framework:
Aperture is the single most important specification in any telescope dob, but “bigger is always better” is an oversimplification that has led thousands of buyers to regret. The right aperture depends on a triangle of factors: your dark-sky access, your physical capability, and your storage constraints.
Understanding the balance between these three variables before spending a dollar separates smart buyers from people who list barely-used scopes on Cloudy Nights six months after purchase.
1: 4.5-Inch to 6-Inch: The Beginner’s Sweet Spot
A 4.5- or 6-inch telescope is lightweight enough to carry in one hand, sets up in under two minutes, and will show you hundreds of deep-sky objects even from a suburban backyard. The Orion SkyQuest XT6 is the canonical example — a 6-inch f/8 telescope that has introduced more beginners to astronomy than perhaps any other single product. Its 150mm mirror resolves the Cassini Division in Saturn’s rings, splits most Messier globular clusters into individual stars, and handles the Great Red Spot on Jupiter on a steady night. For anyone without regular access to truly dark skies, this size range is honest and practical.
2: 8-Inch: The Performance Benchmark
An 8-inch telescope is where the design’s true potential starts to reveal itself. At this aperture, you’re collecting 78% more light than a 6-inch, and the jump in faint-galaxy visibility is startling. M81 and M82 in Ursa Major, the Virgo Cluster galaxies, the central star of the Ring Nebula — all become routine targets. The Orion XT8 and Sky-Watcher 8-inch Dob have been the most popular entry points in this class for well over a decade. At roughly 40–45 lbs for the complete setup, an 8-inch telescope is still genuinely portable.
3: 10-Inch to 12-Inch: The Serious Observer’s Tier
A 10-inch or 12-inch telescope is where casual observing becomes deep-sky hunting. At 12 inches, you can detect objects down to roughly magnitude 15 under dark skies, which opens up Palomar globulars, faint Arp peculiar galaxies, and the challenge of the Herschel 400 list. The weight and bulk increase significantly — a solid-tube 12-inch telescope tube assembly alone weighs about 50 lbs — so storage and transport require honest planning.
4. The 5 Most Common Telescope Dob Mistakes (And How to Avoid Every One):
Even experienced astronomers make setup and usage errors with a telescope that kill viewing quality. These five mistakes are the most costly:
- Skipping thermal cool-down: Bringing a telescope from a 75°F house to a 45°F night and immediately observing produces severe tube currents. The mirror needs time to equilibrate; budget 30–45 minutes minimum for an 8-inch tube.
- Over-magnifying in poor seeing: A telescope will show you when the atmosphere is turbulent; fighting it with a 4mm eyepiece only makes things worse. On average nights, 150–250x is the sweet spot for a 10-inch telescope dob.
- Ignoring collimation after transport: Every drive to a dark-sky site jolts the secondary mirror. Checking and adjusting collimation on-site with a Cheshire or laser collimator takes three minutes and can transform image quality.
- Using a cheap stock eyepiece at high power: The eyepieces bundled with many entry-level telescope kits are adequate for low-power wide fields but fall apart above 150x. A single quality 6mm or 8mm eyepiece — even a used Plössl — will outperform the stock 4mm.
- Standing the rocker box on uneven ground: A level ground board isn’t just for comfort; it affects the balance of a telescope and can cause the tube to drift or slap during observation.
5. Understanding the Optics Inside Your Telescope Dob: Mirror Coatings, Focal Ratios, and Light Paths:
The optics of any telescope dob are where the real money is either well or poorly spent. Budget manufacturers cut corners on coatings and glass quality; premium makers do not. Knowing what to evaluate before you buy will save you from expensive disappointment.
The two primary variables in a telescope optical system are focal ratio and mirror coating quality. Focal ratio (f/number) is the focal length divided by the aperture. A standard 8-inch f/6 telescope has a focal length of roughly 1,200mm. A shorter f/4.7 or f/4.5 tube is more compact but demands higher-quality, more expensive eyepieces to perform across the full field.
1: Why Mirror Coating Reflectivity Matters More Than Most Buyers Realize
Standard aluminum mirror coatings reflect about 88–89% of incoming light. Enhanced aluminum coatings push that to 94–96%. On a telescope dob with two mirrors in the light path, the difference compounds: at 89% per mirror, your total throughput is around 79%. At 95% per mirror, it jumps to roughly 90%. That 11-point difference equals the light-gathering advantage of upgrading from an 8-inch to a 9-inch mirror — at zero extra aperture cost. When comparing telescope dob options at similar price points, always ask about coating specifications.
2: Focal Ratio and Eyepiece Compatibility: The Practical Math
Faster focal ratios in a telescope dob impose stricter demands on eyepiece design. A wide-angle 35mm 2-inch eyepiece that performs beautifully at f/8 will show significant coma in the outer third of the field at f/4.7. This isn’t a flaw in the eyepiece — it’s physics. Parabolic mirrors at short focal ratios concentrate coma. If you’re buying an f/4.7 or faster telescope dob, budget for either a coma corrector (typically $150–$300 for quality units like the Baader MPCC) or specialty wide-field eyepieces designed to handle faster beams.
3: Truss-Tube vs. Solid-Tube: Which Design Wins for Your Use Case
A solid-tube telescope dob is simpler, stiffer, and better at blocking stray light. It’s the right choice for apertures up to about 10 inches where portability isn’t a major constraint. A truss-tube telescope dob breaks down into its mirror box, upper cage, and truss poles — enabling truly large apertures (14 to 30 inches) to be transported in a standard vehicle. The tradeoff is assembly time (10–20 minutes) and the need for a light-shroud to block stray light around the open truss structure.
6. Goto vs. Manual: Which Telescope Dob Setup Is Right for Your Observing Goals:
The most heated debate in Dobsonian astronomy circles isn’t about aperture or eyepieces — it’s about whether computerized GoTo systems belong on a telescope dob at all. Both camps have legitimate arguments. This section lays out the real-world tradeoffs without the tribal bias.
A manual telescope dob requires learning star-hopping navigation, which takes practice but rewards you with a permanent, intuitive map of the sky in your head. Most experienced visual observers who learned on manual equipment describe it as the most satisfying skill development in the hobby. A GoTo telescope dob — like the Orion IntelliScope or Sky-Watcher GoTo Dob — uses encoder wheels and a handbox to direct you to objects from a built-in catalog. It doesn’t automatically track, but it tells you which direction to push the tube to acquire a target.
For visual-only observing, the honest answer is that GoTo matters less than aperture. A 12-inch manual telescope dob will show you more than an 8-inch GoTo model every time. For outreach, public star parties, or observers with limited time, GoTo is genuinely useful for rapidly locating objects in a pre-planned list.
| Feature | 6-inch Dob | 8-inch Dob | 10-inch Dob | 12-inch Dob | 16-inch Truss Dob |
| Aperture (mm) | 152 | 203 | 254 | 305 | 406 |
| Limiting Magnitude (dark sky) | ~13.6 | ~14.2 | ~14.7 | ~15.1 | ~15.9 |
| Typical Focal Ratio | f/8 | f/6 | f/4.7 | f/4.9 | f/4.5 |
| Total Weight (approx.) | 22 lbs | 41 lbs | 54 lbs | 65 lbs | 85 lbs (disassembled) |
| Entry Price (USD, new) | $350–$450 | $550–$750 | $700–$950 | $900–$1,300 | $2,000–$3,500 |
| Best For | Suburban beginners | Versatile all-rounder | Serious visual observing | Deep-sky hunting | Expert/outreach use |
| Coma Corrector Needed? | Rarely | Sometimes | Usually | Usually | Yes |
| Two-Person Setup? | No | No | No | Recommended | Yes |
| GoTo Option Available? | Yes | Yes | Yes | Yes | Limited |
| Recommended Primary Eyepiece | 25mm Plössl | 24mm wide-angle | 21mm Ethos class | 21mm Ethos class | 31mm Nagler class |
7. The Best Eyepieces for a Telescope Dob: Building a Practical, Budget-Conscious Kit:
Eyepieces are the second most important investment after the telescope dob itself, and the pairing matters enormously. The wrong eyepiece in an otherwise excellent telescope dob produces mediocre results; the right eyepiece unlocks the mirror’s full capability.
Every serious telescope dob observer needs three focal lengths covering three power ranges: low (for wide fields and finding objects), medium (the workhorse power for most deep-sky work), and high (for planets and double stars on steady nights). Building this kit smartly, without overspending, is a skill in itself.
1: Low-Power Wide-Field: Your First Eyepiece Priority
For an 8-inch f/6 telescope dob (focal length ~1,200mm), a 35mm or 38mm 2-inch eyepiece gives you roughly 34–43x magnification and a true field of view close to 1.5 degrees — wide enough to frame the entire Pleiades cluster or sweep along the Virgo Cluster. The Orion Telescope dob-compatible 38mm Q70 wide-field eyepiece has been a budget favorite for years; the Celestron 2-inch Luminos 31mm is a step up in quality at a moderate price.
2: Medium Power: Where You’ll Spend Most of Your Time
An 8–13mm eyepiece in a telescope dob of medium focal ratio delivers the 120–200x range — the prime observing territory for most deep-sky targets. The classic Televue Panoptic 13mm is a benchmark in this range, offering a 68-degree apparent field with edge-to-edge sharpness that flatters any telescope dob. For budget builds, a used Orion Stratus 8mm or 13mm is an excellent find.
3: High Power: Planet and Double-Star Performance
Above 250x in a telescope dob, atmospheric seeing becomes the dominant variable. On exceptional nights, a good 4–6mm eyepiece in a well-collimated 8-inch or larger telescope dob reveal Cassini’s Division as a crisp black line, the polar cap of Mars, and the central peak inside lunar craters. The Baader Morpheus series has become the go-to recommendation for high-power performance in this price range.
8. The 5 Best Telescope Dob Models in 2025 by Category:
Cutting through the noise to name the actual telescopes that deliver value in each category — based on direct testing and community consensus:
- Best Beginner Telescope Dob: Orion SkyQuest XT6 Classic — consistent optics, rock-solid rocker box, and a 6-inch aperture that surprises with its capability on suburban nights.
- Best Mid-Range Telescope Dob: Sky-Watcher 8-inch Dobsonian — arguably the best value in all of amateur astronomy today, with a well-machined focuser and good mirror quality straight from the factory.
- Best Portable Large-Aperture Telescope Dob: Apertura AD10 (10-inch) — ships with a 2-inch Crayford focuser, two eyepieces, and a fan for accelerated mirror cooling; its quality control is among the best in its price tier.
- Best GoTo Telescope Dob: Sky-Watcher 10-inch GoTo Dobsonian — the Synscan GoTo system is well-supported, the encoder resolution is adequate for quick acquisition, and the underlying telescope dob optics are solid.
- Best Premium Truss Telescope Dob: Explore Scientific 16-inch Truss Dobsonian — hand-tested optics, excellent build quality, and a mirror that comes with an interferometric test report in the box.
9. Collimation: The Step-by-Step Process Every Telescope Dob Owner Must Master:
If you own a telescope dob and you haven’t fully internalized collimation, you’re observing through degraded optics right now. This is not an exaggeration. Even minor miscollimation in a Newtonian blurs stars and reduces contrast on planetary features. The procedure seems intimidating but takes under five minutes once learned.
The process involves adjusting both the secondary mirror (position and tilt) and the primary mirror (tilt only). Start with the secondary; get it done before touching the primary. A Cheshire eyepiece is the tool of choice for most experienced users because it doesn’t require power and gives immediate visual feedback.
1: Step 1: Center the Secondary Mirror
Insert the Cheshire eyepiece into the focuser of your telescope dob, drawtube fully racked in. Look through it: you’ll see the reflection of the primary mirror, the secondary mirror, and the Cheshire’s crosshairs. The goal is to get the reflection of the primary centered in the secondary. Adjust the secondary’s tilt using its center screw and the three outer screws until the circular reflection of the primary is centered in the secondary’s field.
2: Step 2: Align the Primary Mirror
With the secondary now centered, look again through Cheshire. You should see the crosshairs’ reflection near the center of the primary. Use the three collimation bolts at the back end of your telescope dob’s tube to walk that crosshair reflection to dead center. Do not overtighten these bolts; finger-tight adjustments with one locking bolt per pair is standard practice.
3: Step 3: Star-Test to Confirm Collimation
The definitive confirmation of good collimation in a telescope dob is a star test. Point the scope at a moderately bright star, defocus slightly inside focus, then outside focus. The diffraction rings should appear perfectly concentric. Any asymmetry — a ring that’s thicker on one side — indicates residual miscollimation and tells you which direction to correct.
10. Dark Adaptation, Red Lights, and Site Selection Maximizing What Your Telescope Dob Can Show:
Optics alone don’t determine what you see through a telescope dob — your eyes do. The human eye takes 20–30 minutes to reach full dark adaptation, and a single flash of white light resets the process almost completely. Understanding and protecting your dark adaptation is as important as buying quality eyepieces.
Red light preserves rod cell sensitivity. Use a red flashlight — dedicated astronomy red lights emit wavelengths around 620–700nm — for all tasks at the telescope: reading star charts, adjusting eyepieces, checking notes. Even a phone screen on maximum brightness for two seconds costs you 10–15 minutes of dark adaptation recovery.
Site selection compounds or destroys the advantage of a large telescope dob. Light pollution is quantified on the Bortle Scale from 1 (pristine dark sky) to 9 (inner-city). At a Bortle 4 site (rural/suburban transition), a 10-inch telescope dob can detect galaxies down to about magnitude 14.5. At Bortle 7 (suburban), the same telescope dob struggle past magnitude 12. The Clear Outside and Clear Dark Sky apps both provide Bortle-zone data for planning observing trips.
11. Astrophotography With a Telescope Dob: Realistic Expectations and Actual Techniques:
The telescope dob is not the natural tool for long-exposure astrophotography. Dobsonians lack motor-driven equatorial tracking, which means stars trail in exposures longer than about 10–15 seconds depending on declination. That said, a telescope dob can absolutely produce impressive images if you work within its actual capabilities.
Electronically Assisted Astronomy (EAA) is the sweet spot for a telescope dob and a camera. Using a compact astronomy camera like the ZWO ASI385MC or ASI294MC, you stack very short exposures in real time using software like Sharpcap or Stellarmate. A 10-inch telescope dob with a ZWO camera running Sharpcap’s Live Stack function can produce a usable image of the Orion Nebula’s core structure in under two minutes of accumulated integration, visible live on a laptop screen. This isn’t traditional astrophotography, but the results genuinely impress.
Planetary and lunar imaging is where a telescope dob truly shines photographically. Planets are bright enough to capture in high-frame-rate video at very short exposures — 5ms to 20ms — meaning tracking drift is negligible. A planetary camera like the ZWO ASI224MC connected to a well-collimated 12-inch telescope dob captures Jupiter’s equatorial belts, the festoons, and great red spot detail that rivals observatory photography from the 1980s.
12. Maintaining Your Telescope Dob Long-Term: Cleaning, Storage, and Bearing Maintenance
A well-maintained telescope dob will outlast its owner. The mechanics are simple, the materials are durable, and there are no electronics to fail in a basic manual setup. But neglect does accumulate, and it shows in optical quality.
The most common mistake is cleaning the primary mirror too often. A dusty mirror loses very little light — typically less than 1% per year of ambient dust accumulation. Cleaning introduces micro-scratches in the coating. The correct approach is to clean the primary mirror of a telescope dob only when you can see visible debris that’s causing visible contrast loss, and to use a gentle flow of distilled water, a small amount of diluted dish soap, and cotton balls with zero pressure. Never use paper towels on a mirror.
The Teflon bearings in the altitude and azimuth axes of a telescope do occasionally need attention. Altitude bearings that feel sticky usually need the riding surfaces (typically high-density polyethylene or laminate) lightly cleaned with a damp cloth. If azimuth feels too tight or too loose, check that the ground board is truly level and that the center bolt isn’t overtightened. The balance of a telescope dob in altitude changes with different eyepieces and accessories; most designs allow you to shift the tube in its rings or adjust the center of gravity with a counterweight system for heavier accessories.
FAQ’s:
Q1:What is a telescope dob best used for?
A telescope dob excels at deep-sky visual observing — galaxies, nebulae, and star clusters — thanks to its large aperture at low cost.
Q2:Is a telescope good for beginners?
Yes — the push-to alt-azimuth mount is the most intuitive design in amateur astronomy and requires no prior knowledge to operate.
Q3:Can a telescope dob track objects automatically?
A basic manual telescope dob does not track, but GoTo Dobsonian models use encoders and a digital handbox to assist in locating and following targets.
Q4:How often should I collimate my telescope?
Check collimation before every observing session; a quick star test takes two minutes and guarantees optimal image quality.
Q5:What size telescope dob should a first-time buyer get?
An 8-inch telescope dob is the near-universal recommendation: portable, affordable, and capable enough to hold your interest for years.
Conclusion:
The telescope dob remains the highest-value instrument in amateur astronomy — no other design delivers as much aperture, usability, and long-term satisfaction per dollar spent. Buy the largest telescope you can realistically transport and store, learn collimation, protect your dark adaptation, and you’ll have a lifetime of deep-sky exploration waiting in your own backyard.