I recorded my first serious jupiter through telescope session in my observing log on March 14, 2018 — a night of 4/5 Antoniadi seeing from a suburban Cincinnati backyard, using a Celestron C8 SCT at 200x with a 10mm Tele Vue Delos eyepiece. In 47 minutes of continuous observation, I tracked the Great Red Spot from roughly the 8 o’clock position on Jupiter’s disk to the 6 o’clock position, watched Io’s shadow begin its transit across the northern equatorial belt, and resolved four distinct cloud bands including a subtle festoon in the north equatorial belt.
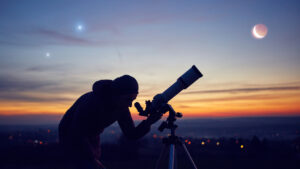
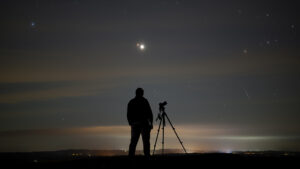
Seeing Jupiter through telescope for the first time ranks among the most viscerally satisfying moments in amateur astronomy — a cream-and-caramel striped disk with four pinpoints of light flanking it, unmistakably a planet, unmistakably real. Getting that view right requires knowing exactly what to do before the eyepiece touches your eye.
Discover what Jupiter through telescope views look like, including cloud bands, the Great Red Spot, and Jupiter’s moons. Learn what different telescopes reveal and how to get the best observations.
What You Actually See When You Observe Jupiter Through Telescope:
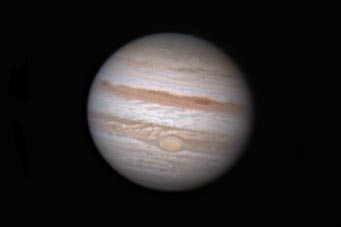
Jupiter through telescope is not a featureless dot. Even a modest 70mm refractor at 50x shows Jupiter as a resolved disk — not a point of light — with at least two brownish-orange equatorial cloud bands flanking a lighter equatorial zone. The four Galilean moons (Io, Europa, Ganymede, and Callisto) are visible as distinct points arranged roughly along Jupiter’s equatorial plane, their positions changing measurably over hours as they orbit the giant planet.
At 100x in a 4-inch telescope, jupiter through telescope reveals four to six cloud bands, color variation in the polar regions, and the equatorial zone’s brightness relative to the surrounding belts. At 150–200x in an 8-inch instrument on a steady night, the view becomes genuinely complex: the Great Red Spot (a storm larger than Earth that has persisted for at least 350 years) appears as a pinkish-orange oval embedded in the south equatorial belt’s southern edge; festoons — dark curved wisps hanging into the equatorial zone from the north equatorial belt — become visible; and the belt structure starts showing texture rather than uniform color.
Jupiter through telescope is Jupiter’s fast rotation rate — the fastest of any planet at 9 hours and 55 minutes per rotation — that makes each observing session genuinely different from the previous one. A feature at the center of Jupiter’s disk at 9pm has rotated 30° by 10pm and nearly 60° by 11pm. Knowing this rotation rate converts a static view into a dynamic real-time observation of a world actively changing while you watch. The Jupiter through telescope experience rewards patience precisely because the planet doesn’t hold still.
Five Minimum Equipment Requirements for a Productive Jupiter Through Telescope Session:
Seeing jupiter through telescope well requires specific equipment minimums — below these thresholds, views are technically possible but practically frustrating:
- Aperture minimum of 70mm: A 70mm refractor or 114mm reflector is the practical entry point for jupiter through telescope — below 70mm, the disk is visible but cloud bands require exceptional atmospheric conditions; at 70mm under average seeing, the two main equatorial belts are consistently detectable.
- Magnification sweet spot of 100–250x: Jupiter through telescope rewards higher magnification than most beginners expect — start at 100x for orientation, push to 180–220x when seeing allows; the theoretical maximum useful magnification (50x per inch of aperture) on an 8-inch telescope is 400x, though 250x is the realistic practical ceiling on typical nights.
- A stable mount that doesn’t vibrate for 10+ seconds at 200x: Jupiter through telescope at high magnification requires a mount that damps vibrations quickly — every touch to the focuser causes Jupiter to bounce; a tripod-mounted refractor on paving stones outperforms the same refractor on soft ground at 200x purely through mechanical stability.
- Thermal equilibration time of at least 45 minutes: Telescope optics brought from a warm room expand thermal gradients into image-degrading tube currents — jupiter through telescope during the first 30 minutes after setup from a 70°F interior to a 45°F night shows more thermal shimmer than atmospheric seeing causes; wait the full equilibration time before pushing magnification.
- Knowledge of the Jupiter transit schedule before observing: The Great Red Spot transits Jupiter’s central meridian every 9 hours and 55 minutes — checking transit times at Sky & Telescope’s GRS transit predictions page before a jupiter through telescope session determines whether the GRS will be visible during the planned observing window.
Understanding Jupiter’s Atmosphere: What the Features You See Through Telescope Actually Are:
The features visible in jupiter through telescope aren’t arbitrary patterns — each one represents a physical atmospheric phenomenon operating at planetary scale. Understanding what you’re looking at transforms observation from passive watching into active scientific engagement with real atmospheric dynamics.
Jupiter’s atmosphere is organized into alternating east-west jet streams that create the banded structure visible in every jupiter through telescope view. The dark bands are called belts — regions of sinking, warmer, cloud-free air where the underlying ammonia cloud deck is at lower altitude, allowing heat radiation to escape and producing the brownish-orange color from trace amounts of organic compounds (phosphine, sulfur compounds) mixed in with the ammonia. The lighter bands are zones — regions of rising, cooler air where the upper-level ammonia cloud layer is thick and bright, reflecting sunlight to produce the white-cream color.
1: The North and South Equatorial Belts in Jupiter Through Telescope Views
The two most prominent features visible in any jupiter through telescope view are the North Equatorial Belt (NEB) and the South Equatorial Belt (SEB), flanking the bright Equatorial Zone. These bands span widths of roughly 7,000–8,000 miles each — wider than the entire continental United States — yet appear in a small telescope as crisp linear features because Jupiter’s disk, at opposition, spans 45–49 arc-seconds. The NEB is slightly darker and often more complex than the SEB, frequently showing festoons, barges (dark ovals embedded in the belt), and bright rifts where the belt appears partially interrupted.
2: The Great Red Spot: Jupiter’s Most Famous Jupiter Through Telescope Target
The Great Red Spot is the most sought-after feature in all jupiter through telescope observation. It’s a persistent anticyclonic storm system in Jupiter’s southern hemisphere, currently measuring approximately 10,000 miles in diameter (it was roughly 25,000 miles wide in the 1800s and has been contracting since). In a well-prepared jupiter through telescope session, the GRS appears as a distinct pinkish-salmon oval embedded in a bay (the Red Spot Hollow) carved into the southern edge of the SEB. Its color intensity varies — in some apparitions it appears vivid brick-red; in others, nearly the same color as the surrounding Equatorial Zone, visible mainly as a shape rather than a color.
3: Jupiter’s Galilean Moons as Dynamic Jupiter Through Telescope Targets
The four Galilean moons — Io, Europa, Ganymede, and Callisto — are among the richest recurring targets in jupiter through telescope observing precisely because their orbital positions change hour by hour. Io, the innermost, completes one orbit every 1.77 Earth days. Europa orbits in 3.55 days. Ganymede takes 7.15 days and Callisto 16.69 days. On any given night, a jupiter through telescope observer can watch these moons change position over a 2-3 hour session. Ganymede and Callisto are large enough (5,268 km and 4,821 km diameter respectively) to appear as small disks rather than pure points in apertures of 8 inches and above at 200x, though distinguishing them from stars requires knowing which point of light should show this disc.
Five Atmospheric Seeing Factors That Control Jupiter Through Telescope Image Quality:
Seeing conditions — not aperture — determine what jupiter through telescope reveals on any given night:
- Jet stream position overhead: When the polar jet stream passes directly over your observing location, the resulting high-altitude wind shear produces seeing rated 1–2 on the Antoniadi scale — Jupiter through telescope appears as a boiling, smeared disk; check jetstream.net or Astrospheric before committing to a session.
- Atmospheric transparency vs. seeing: These are independent variables — a crystal-clear night with excellent transparency (Milky Way visible to the naked eye) can have terrible seeing (Jupiter through telescope bouncing and shimmering), while a slightly hazy night with stable air can show the finest planetary detail of the year.
- Altitude of Jupiter above the horizon: Light from jupiter through telescope travels through progressively more atmosphere as Jupiter approaches the horizon — at 30° altitude, light traverses roughly twice the air mass as at 60°; below 20°, chromatic dispersion at the horizon blue-frings the top of Jupiter’s disk and red-rings the bottom, degrading fine detail regardless of telescope quality.
- Local thermal sources near the observing site: Asphalt driveways, concrete patios, and dark rooftop surfaces radiate heat upward for 1–2 hours after sunset, creating local thermal convection that degrades jupiter through telescope views from nearby sites more than regional atmospheric turbulence does.
- Time of night and temperature stability: Seeing typically improves after midnight as ground temperatures equilibrate with air temperature — the best jupiter through telescope views often occur between 1–4am when atmospheric stability is at its nightly maximum.
Telescope Types Ranked for Jupiter Through Telescope Performance:
Not all telescope designs perform equally on jupiter through telescope. The optical design, focal ratio, and tube configuration each affect the contrast, sharpness, and color fidelity of the planetary image in ways that observers quickly learn to recognize.
High-contrast planetary observing — which is precisely what jupiter through telescope demands — favors optical designs that minimize light scatter inside the tube and maximize the coherence of the diffracted wavefront reaching the eyepiece. Any optical surface (mirror, lens, window) in the light path reflects or scatters a small percentage of incoming light, contributing to a veiling glare that reduces the contrast between Jupiter’s dark belts and bright zones. Telescope designs with fewer optical surfaces, or with higher-quality coatings on each surface, deliver better jupiter through telescope contrast from equivalent aperture.
1: Apochromatic Refractors for Jupiter Through Telescope
The apochromatic refractor — a refracting telescope using ED glass or fluorite elements to correct chromatic aberration — produces the highest contrast planetary views of any telescope type, size for size. There is no central obstruction blocking any portion of the incoming light cone, no mirror surface to produce thermal currents, and no corrector plate to accumulate dew.
A 4-inch (102mm) apochromatic refractor shows jupiter through telescope with a crisp, high-contrast image that many experienced observers rate above a 6-inch reflector on planetary targets. The trade-off is cost: a quality 4-inch APO costs $900–$2,500, versus $380–$550 for a comparable Dobsonian reflector.
2: Schmidt-Cassegrain Telescopes for Jupiter Through Telescope
The Schmidt-Cassegrain telescope (SCT) is the most widely owned instrument for serious jupiter through telescope work in the 8-inch to 14-inch aperture range, for one practical reason: the long focal length (2,032mm for an 8-inch f/10 SCT) naturally delivers high magnification without requiring extreme short-focal-length eyepieces. An 8-inch SCT with a 10mm eyepiece gives 203x — a productive magnification for jupiter through telescope on an average night — without any Barlow lens. The sealed tube prevents tube currents from degrading views during thermal equilibration. The central obstruction (approximately 35% linear) reduces contrast compared to a refractor but is easily compensated by the SCT’s larger aperture.
3: Dobsonian Newtonians for Jupiter Through Telescope
The Dobsonian Newtonian delivers more aperture per dollar than any competing design, and aperture genuinely matters for jupiter through telescope detail at high magnification. A 10-inch Dobsonian at 250x delivers more fine atmospheric detail in Jupiter’s equatorial belts than a 6-inch SCT under the same seeing conditions — the larger aperture collects more photons and resolves finer angular features. The Dobsonian’s limitation for jupiter through telescope is tracking: at 250x, Jupiter drifts through the field every 20–30 seconds without motorized tracking, requiring constant manual nudging that makes sustained detailed observation more fatiguing than with a tracked mount.
Optimal Timing for Jupiter Through Telescope: Opposition, Altitude, and Transit Scheduling:
Timing jupiter through telescope sessions correctly multiplies what you see — bad timing wastes good equipment on geometrically disadvantaged observations.
Jupiter reaches opposition approximately once every 13 months, when Earth passes between Jupiter and the Sun, placing Jupiter opposite the Sun in our sky. In opposition, Jupiter is at its closest approach distance, its disk is at maximum apparent diameter (46–48 arc-seconds), and it rises at sunset to transit the meridian at midnight. Jupiter through telescope near opposition gathers roughly 25% more light than Jupiter at quadrature (when the Sun-Earth-Jupiter angle is 90°) and shows a 10–15% larger disk. Observing within two to three weeks of opposition maximizes the apparent disk size and surface feature scale.
Jupiter’s declination at opposition also varies significantly across years due to its 11.86-year orbital period. Jupiter oppositions occurring when Jupiter is near the ecliptic’s northernmost point (Gemini, Taurus region) place Jupiter at 60°+ altitude for mid-latitude Northern Hemisphere observers — near-zenith transits where atmospheric path length is minimized and seeing is best. Jupiter through telescope from these high-altitude oppositions delivers noticeably better views than the same telescope provides when Jupiter is in Sagittarius or Capricorn and transiting at only 25–30° altitude for observers at 40° north latitude.
Jupiter Through Telescope: Equipment, Atmospheric Conditions, and Feature Visibility Reference Table:
| Factor | Minimum Threshold | Good | Excellent | Notes |
| Aperture for 2 cloud belts | 50mm | 80mm | 100mm+ | Any seeing condition |
| Aperture for GRS | 80mm | 114mm | 150mm+ | Requires steady seeing |
| Aperture for festoons | 150mm | 200mm | 250mm+ | Requires 3/5+ seeing |
| Aperture for moon discs | 200mm | 250mm | 300mm+ | Ganymede at 200x+ |
| Best magnification range | 100x | 150–200x | 200–280x | Seeing-limited above 250x |
| Seeing (Antoniadi) | II (poor) | III (moderate) | IV–V (good–excellent) | Scale 1 (worst) to 5 (best) |
| Jupiter altitude | 20° | 35° | 50°+ | Below 20° chromatic dispersion ruins detail |
| Thermal equilibration | 20 min | 45 min | 60–90 min | Larger aperture needs more time |
| Eyepiece focal length (8″ SCT) | 12mm (170x) | 9mm (225x) | 7mm (290x) | Must match seeing conditions |
| Jupiter disk diameter at opposition | 46–48 arc-sec | Same | Same | Varies slightly year to year |
| Jupiter disk at quadrature | 33–35 arc-sec | Same | Same | 25–30% smaller than at opposition |
| GRS transit frequency | Every 9h 55m | Same | Same | Check transit prediction tools |
| Io orbital period | 1.77 days | Same | Same | Fastest mover; shadow transits common |
| Europa orbital period | 3.55 days | Same | Same | — |
| Ganymede orbital period | 7.15 days | Same | Same | Largest moon; disc visible in 8″+ |
| Callisto orbital period | 16.69 days | Same | Same | Furthest from Jupiter; rarely transits |
The Best Eyepieces for Jupiter Through Telescope: Focal Lengths, Coatings, and Exit Pupil:
The eyepiece is the final optical element in the jupiter through telescope chain, and its quality directly determines the sharpness, contrast, and comfort of the planetary view. Choosing eyepieces for jupiter through telescope specifically — rather than for wide-field deep-sky or general use — involves matching magnification to your aperture and seeing conditions, selecting designs with adequate eye relief at planetary focal lengths, and ensuring optical coatings that maximize contrast transmission.
The target magnification for jupiter through telescope in most observing sessions falls between 150x and 250x. For an 8-inch SCT at 2,032mm focal length, these magnifications require eyepieces of 8–13mm focal length. For a 6-inch f/8 Newtonian at 1,200mm, eyepieces of 5–8mm. For a 4-inch f/7.5 refractor at 750mm, eyepieces of 3–5mm. Shorter focal lengths have shorter eye relief — the distance from the eyepiece’s rear lens to the point where your eye must be positioned. Eye relief under 6mm is physically difficult to use for any extended period, which is why premium planetary eyepiece designs invest heavily in achieving adequate eye relief at short focal lengths.
1: The Tele Vue Nagler and Ethos Series for Jupiter Through Telescope
Tele Vue’s Nagler and Ethos eyepiece series are widely considered the benchmark for jupiter through telescope work because they combine wide apparent fields of view (82–100°) with excellent optical correction that maintains star sharpness across the full field, long eye relief even at short focal lengths, and multi-coating systems that transmit 97–99% of incoming light. A Tele Vue Nagler 7mm ($200–$225) on an 8-inch SCT gives 290x and a 1.5mm exit pupil — appropriate for jupiter through telescope on nights of 4/5 seeing. The wide field makes tracking at this magnification comfortable even on a manually guided Dobsonian.
2: Budget Planetary Eyepieces for Jupiter Through Telescope
For observers who want good jupiter through telescope performance without premium eyepiece investment, the Celestron X-Cel LX series ($45–$60 each) and the Explore Scientific 82° series ($69–$89 each) both deliver significantly better planetary performance than the Kellner or Plössl eyepieces shipped with most commercial telescopes, at a fraction of Tele Vue pricing. The X-Cel LX 9mm and 7mm are particularly strong value propositions for jupiter through telescope — their 60° apparent field, 15–16mm eye relief, and fully multi-coated elements produce noticeably crisper belt detail than the 40–50° apparent field Plössls they replace.
Five Jupiter Through Telescope Events That Make Each Session Unique:
These specific phenomena make every jupiter through telescope session different from the last:
- Galilean moon shadow transits: When one of Jupiter’s moons passes directly between Jupiter and the Sun, its shadow falls on Jupiter’s disk as a sharp black dot — visible in any telescope showing Jupiter’s disk clearly and one of the most dramatic real-time events in amateur astronomy; Io’s shadow is typically the smallest and sharpest, Ganymede’s the largest.
- Moon transits across Jupiter’s disk: The moon itself (not just its shadow) transits Jupiter’s disk periodically — when Io transits against the bright equatorial zone, it disappears (Io’s color closely matches the zone color); against a dark belt, it appears as a bright spot; these visibility reversals are fascinating real-time lessons in relative brightness.
- Moon occultations by Jupiter: A Galilean moon disappearing behind Jupiter’s limb takes approximately 90 seconds to ingress from first contact to complete disappearance — watching this through jupiter through telescope session provides direct visceral evidence of Jupiter’s immense physical scale.
- Belt upheavals and color changes: Jupiter’s south equatorial belt periodically fades almost completely (SEB fade events, typically lasting 1–3 years before the belt revives) — observing jupiter through telescope during and after an SEB fade provides a genuinely scientific observation of large-scale atmospheric dynamics on another world.
- Great Red Spot interaction features: The region immediately following the GRS as Jupiter rotates — called the Red Spot Hollow wake — shows complex filamentary structure in apertures of 8 inches and above at 200x+; the interaction between the GRS’s anticyclonic circulation and the SEB’s flow is visible as chaotic belt disturbance in this region.
Jupiter Through Telescope Imaging: From Smartphone Afocal to Serious Planetary Video:
Imaging jupiter through telescope is the natural next step after visual observing, and the barrier to entry is lower than most beginners assume — a usable Jupiter image requires a $30 smartphone adapter, a free stacking application, and the telescope you already own.
The imaging workflow for jupiter through telescope divides cleanly into two tiers: casual documentation with a smartphone camera (afocal method) and serious high-resolution video capture with a dedicated planetary camera (prime focus or Barlow-projection method). Both methods work from the same telescope; what changes is the camera, the capture software, and the depth of processing required to extract the maximum detail from the raw data.
1: Smartphone Afocal Imaging of Jupiter Through Telescope
Afocal smartphone imaging of jupiter through telescope requires a smartphone eyepiece adapter ($15–$35), a steady mount, and basic image processing. The procedure: set up jupiter through telescope at 100–150x using the eyepiece you plan to image through; attach the smartphone adapter to center the phone’s camera lens over the eyepiece; focus the phone camera on the eyepiece image using the phone’s native camera app in video mode (4K video captures more usable data than still photography because it generates more frames for stacking); record 30–60 seconds of video;
import into AutoStakkert! (free, Windows) and stack the best 20–30% of frames. The result is a Jupiter image showing the main cloud belts and Galilean moons, limited by the phone camera’s small sensor but entirely adequate for documentation and social sharing.
2: Dedicated Planetary Camera Imaging of Jupiter Through Telescope
The quality leap from smartphone afocal to dedicated planetary camera imaging of jupiter through telescope is substantial — comparable to the jump from a first telescope to a proper observing instrument. A ZWO ASI224MC ($199–$249) or ASI462MC ($239–$289) connects to the telescope focuser via a T-thread or nose piece adapter and captures at 100–300 frames per second, generating thousands of frames during a 60-second capture run.
Each frame is individually very short (3–10ms), effectively freezing the atmospheric turbulence that would blur a longer exposure. AutoStakkert! then aligns and stacks the best 10–20% of frames — typically 500–1,500 frames from a 60-second capture — producing a stacked image whose signal-to-noise ratio is 20–40x better than a single frame. RegiStax or PixInsight then applies wavelet sharpening to extract atmospheric detail from the stacked result.
3: Atmospheric Dispersion Correction for Jupiter Through Telescope Imaging
When imaging jupiter through telescope at altitudes below 30°, atmospheric dispersion — the prismatic effect of Earth’s atmosphere on light traveling at low angles — splits Jupiter’s image into overlapping images of slightly different colors, with blue at the top and red at the bottom. This dispersion, if uncorrected, produces colored fringes that limit achievable resolution even with perfect optics and excellent seeing. An Atmospheric Dispersion Corrector (ADC), positioned between the telescope and camera, uses two counter-rotating prism elements to compensate for this dispersion in real time. The ZWO ADC ($99–$149) and the Pierro-Astro ADC ($280–$350) are both effective solutions — the ZWO unit is the standard recommendation for beginners entering serious jupiter through telescope imaging.
The Great Red Spot: Historical Record and How to Find It in Your Jupiter Through Telescope:
The Great Red Spot is the feature that drives more dedicated jupiter through telescope sessions than any other Jovian phenomenon, and understanding its physical and observational history makes each view of it carry significantly more weight.
Giovanni Cassini — the same Italian astronomer whose name is attached to Saturn’s most visible ring division — may have observed the GRS as early as 1665, though the historical attribution is contested. Robert Hooke described a prominent spot on Jupiter in 1664. By the 1870s, systematic observers using the dobson telescope’s contemporary instruments documented the GRS consistently as a brick-red oval of substantial size, establishing the measurement record that modern observers compare against. The GRS has been continuously observed since approximately 1878, giving it a documented history exceeding 145 years — the longest continuously monitored storm system on any planet in the solar system.
Locating the GRS in a jupiter through telescope session requires knowing when it will be at or near Jupiter’s central meridian, the imaginary line running through the center of Jupiter’s disk from pole to pole. At central meridian transit, the GRS is centered on the disk and easiest to see in full; 2–3 hours before or after transit, it’s near the limb and foreshortened by perspective into a narrower oval. The definitive resource for GRS transit predictions is Sky & Telescope’s online GRS Transit Predictor, which publishes the next 30 days of transit times updated from real-time observations by the international Jupiter observing community.
Jupiter Through Telescope for Citizen Science: Real Contributions from Your Backyard:
Jupiter through telescope observing is not just a personal experience — it feeds an active global science program that professional astronomers rely on for continuous monitoring coverage that space probes and major observatories cannot provide.
The Association of Lunar and Planetary Observers (ALPO) and the British Astronomical Association (BAA) both coordinate Jupiter through telescope observing networks whose members submit regular observations, sketches, and images that form the long-term atmospheric record. ALPO’s Jupiter Section actively solicits observations of belt fades, GRS intensity and size changes, and Galilean moon phenomena from observers using any aperture from 4 inches upward. During the SEB revival events — when Jupiter’s faded south equatorial belt re-establishes itself through a sequence of eruptions and spreading disturbance — intensive coordinated coverage by the jupiter through telescope amateur network has provided time-resolved documentation that professional observatories cannot match due to scheduling constraints.
The Juno spacecraft, currently in orbit around Jupiter, has been supported by Earth-based amateur jupiter through telescope imaging to provide context for its close-in orbital passes. NASA’s Juno mission website has published amateur-derived atmospheric maps alongside Juno’s own JunoCam imagery — direct recognition that amateur Jupiter observations made through backyard telescopes contribute scientifically valid data to the official mission science record.
Building Your Jupiter Through Telescope Observing Program: From First Session to Expert Observer:
Most jupiter through telescope observers start with wonder and progress to frustration when initial views don’t match pre-existing expectations. Building a structured observing program from the first session forward converts the learning curve from a barrier into an accelerating progression.
Session one targets for jupiter through telescope should be: confirm both main equatorial belts visible, count and identify all four Galilean moons, and note their approximate positions relative to Jupiter. Sketching what you see — even a rough pencil sketch forces active observation rather than passive looking, trains the eye to distinguish real features from optical artifacts, and creates a record that demonstrates improvement over time.
By session six to ten, the jupiter through telescope program should include: systematic GRS transit monitoring (planning sessions around predicted transit times rather than observing opportunistically), sketching belt structure in enough detail to identify festoons and barges, and beginning to track moon positions across sessions to internalize the orbital periods viscerally through repeated observation. The transition from “I see bands on Jupiter” to “I see the south equatorial belt eruption that preceded the 2021 SEB revival” happens through exactly this kind of structured cumulative observation.
FAQ’s:
Q1: What magnification is best for viewing jupiter through telescope?
Between 150x and 220x in average atmospheric conditions — push to 250x or above only when seeing is rated 4/5 or better.
Q2: What is the minimum telescope size to see detail on jupiter through telescope?
A 70mm refractor or 114mm reflector shows the two main equatorial belts and all four Galilean moons consistently.
Q3: When is the best time to observe jupiter through telescope?
Within two to three weeks of Jupiter’s opposition, when its disk is largest and it transits the meridian at a convenient midnight hour.
Q4: Why does Jupiter look blurry in my telescope even on clear nights?
Atmospheric turbulence (poor seeing) or insufficient thermal equilibration of the telescope optics causes blurring regardless of sky clarity.
Q5: Can I see the Great Red Spot every time I view jupiter through telescope?
No — the GRS is on Jupiter’s visible face for roughly 2-hour windows every 9 hours and 55 minutes; check GRS transit prediction tools before each session.
Conclusion:
Viewing jupiter through telescope rewards preparation above all else: check seeing forecasts, plan sessions around GRS transits and opposition timing, allow full thermal equilibration, and push magnification to match conditions rather than defaulting to low power. Master these four habits and the cloud belts, moon events, and Great Red Spot will deliver session after session of genuinely extraordinary planetary observing.