In the summer of 2022, I spent eleven nights on the Colorado Plateau at 7,200 feet elevation with a William Optics Redcat 51 — a 250mm focal length, f/4.9 apochromat sitting on a Rainbow Astro RST-135 harmonic drive mount — targeting the Rho Ophiuchi cloud complex during its window of visibility before dawn. Across those eleven nights, I accumulated 23.4 hours of total integration using a cooled ZWO ASI2600MC Pro at -10°C, processing the final mosaic in PixInsight with a BlurXTerminator pass before GradientCorrection and Starless separation.
Astro imaging telescopes sit at the intersection of optics, electronics, and obsessive patience — and getting that intersection right is what separates a hard drive full of noise from images that stop people cold. Most buyers discover the hard way that the telescope is only one variable in a system where every component either earns its place or destroys the result.
Discover 7 amazing astro imaging telescopes secrets to capture stunning photos of planets, galaxies, and nebulae with professional-quality results.
What Distinguishes Astro Imaging Telescopes From Visual Instruments:
The casual assumption that any telescope works for astrophotography is the most expensive misconception in amateur astronomy. Astro imaging telescopes are purpose-engineered for sensor coupling — their design priorities differ from visual instruments in four specific, measurable ways.
Field flatness. Visual telescopes optimize image quality at the center of the field where the eye looks. Astro imaging telescopes must maintain sharp stars across the entire sensor area — corners, edges, and center simultaneously. A visual instrument showing excellent star images at the eyepiece frequently shows bloated, triangular, or comatic stars in the corners of a camera sensor. Purpose-built astro imaging telescopes incorporate field flatteners, corrector lenses, or apochromatic designs that address this directly.
Back focus distance. The distance from the telescope’s rear port to the focal plane must precisely match your camera’s flange focal distance plus any filter wheel, off-axis guider, or other accessory in the optical train. Astro imaging telescopes designed for photography provide generous, calculated back focus — typically 50–80mm — that accommodates realistic accessory stacks. Visual telescopes optimized for star diagonals and eyepieces often provide inadequate back focus for camera setups, requiring problematic adaptation that introduces tilt and vignetting.
Focuser rigidity. An eyepiece session requires focusing once and observing. Astrophotography requires the focuser to maintain exactly the same position for hours while a camera — heavier than any eyepiece — hangs from the back. Astro imaging telescopes use Crayford or rack-and-pinion focusers with tension adjustment and, in premium models, motorized electronic focusing that compensates for thermal focus drift automatically.
Focal ratio and imaging speed. Imaging bright targets at f/5 requires one-fourth the exposure time of f/10 for identical signal-to-noise ratio. Astro imaging telescopes in the f/4–f/7 range dominate the market precisely because they reduce total integration time per target, enabling more sky coverage in any given observing season.
The Five Core Optical Designs Used in Astro Imaging Telescopes:
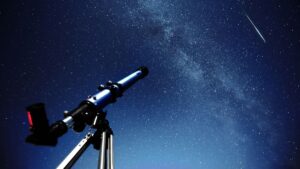
Understanding which optical design serves which imaging goal prevents the single most common expensive mistake in astrophotography equipment selection. Here are the five designs that dominate the astro imaging telescopes market:
- Apochromatic refractors (APO): ED or fluorite glass elements eliminate chromatic aberration — stars appear as clean white points rather than blue-haloed blobs. The Skywatcher Esprit 100ED, William Optics GT81, and Askar 103APO represent this category. Best for wide-to-medium field deep-sky imaging, travel, and emission nebula targets.
- Newtonian and astrograph Newtonians: Fast parabolic mirrors (f/4–f/5) provide maximum aperture per dollar with wide fields — the Skywatcher Explorer 200PDS and Orion 8-inch astrograph are proven performers. Require coma correctors for edge-of-field star quality and regular collimation.
- Ritchey-Chrétien (RC) telescopes: Hyperbolic primary and secondary mirrors eliminate coma across wide fields without correctors — used by Hubble and most professional observatories. The Astro-Tech AT8RC at 1,625mm focal length targets galaxy detail. Demanding collimation requirements and central obstruction reduce contrast somewhat versus refractors.
- Corrected Dall-Kirkham (CDK) aplanats: The Planewave CDK series represents the premium end — fully corrected across the largest sensors with no off-axis aberrations. Used by research institutions and serious imagers with large-format cameras. Expensive but optically the finest astro imaging telescopes available to amateurs.
- Schmidt-Cassegrain with focal reducers: The Celestron EdgeHD series at f/7 with focal reducer, or the standard C8/C11 at f/6.3 reduced, functions as a compact astro imaging telescope for galaxy and planetary nebulae work. Field flatness is genuine on EdgeHD; less so on standard SCTs without correction.
Focal Length, Pixel Scale, and the astro imaging telescopes Equation Every Serious Imager Uses:
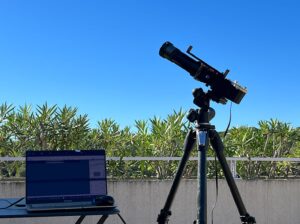
The single calculation that separates systematic imagers from perpetual beginners in astro imaging telescopes selection is the pixel scale equation. Get this right before buying any instrument, and the rest of the system builds coherently around it.
Pixel scale in arcseconds per pixel equals 206.265 multiplied by the pixel size in microns, divided by the focal length in millimeters. This equation tells you exactly what angle of sky each pixel covers — and therefore how well your astro imaging telescope and camera combination resolves fine detail versus oversamples or undersamples the atmospheric seeing limit.
1: The Pixel Scale Equation Applied to Real Astro Imaging Telescopes
Typical suburban seeing conditions produce an atmospheric blur of 2–4 arcseconds. Nyquist sampling theory — the mathematical principle determining adequate sampling — requires at least two pixels per resolution element to faithfully record detail. A well-sampled astro imaging telescope system should therefore target 1–2 arcseconds per pixel for suburban sites with 2–4 arcsecond seeing. Example: a ZWO ASI2600MC Pro with 3.76-micron pixels at 420mm focal length (Askar 107PHQ) produces 1.85 arcseconds per pixel — correctly sampled for 3-arcsecond seeing. The same sensor on a 250mm focal length instrument produces 3.1 arcseconds per pixel — slightly undersampled but functional for wide emission nebula fields where resolution of individual features matters less than total field capture.
2: Focal Length Matching to Target Angular Size
Every celestial target has an angular size — the arc of sky it occupies as seen from Earth. The Andromeda Galaxy spans 3×1 degrees. The Orion Nebula’s full extent is 65×60 arcminutes. The Crab Nebula is 7×5 arcminutes. Effective astro imaging telescopes for each target differ enormously: a 250mm focal length astrograph captures the full Andromeda Galaxy across an APS-C sensor with room for the satellite galaxies; a 2,000mm focal length instrument renders Andromeda across hundreds of frames requiring mosaic stitching. Match focal length to target first — then evaluate which astro imaging telescopes in that focal length range meet your other requirements.
3: Sensor Size and the Field of View Calculation
Field of view in degrees equals sensor dimension in millimeters multiplied by 57.3, divided by focal length in millimeters. A full-frame sensor (36×24mm) on a 420mm focal length astro imaging telescope yields 4.9×3.3 degrees — enough to frame the Pleiades with context stars. An APS-C sensor (23.5×15.6mm) on the same instrument gives 3.2×2.1 degrees. Before purchasing astro imaging telescopes, calculate the field of view for both your current sensor and any sensor upgrades you anticipate within two years — the optimal focal length may differ between them, and selecting now for your two-year setup saves one expensive transition.
Mount Compatibility: The Variable That Governs Everything Else in Astro Imaging Telescopes:
Astrophotographers consistently rank mount quality above telescope optical quality in impact on final image sharpness. Five specific mount considerations for astro imaging telescopes:
- Payload rating at 50% of spec: Manufacturers’ payload ratings describe the maximum load for visual use. For astro imaging telescopes, apply a 50% reduction — a mount rated for 20 kg should carry no more than 10 kg of optical tube, camera, guide scope, and accessories for stable tracked imaging.
- Periodic error and autoguiding: Unguided periodic error in most mounts runs 8–30 arcseconds peak-to-valley. Autoguiding through PHD2 software reduces this to under 1 arcsecond on quality mounts — mandatory for exposures longer than 60 seconds with long focal length astro imaging telescopes.
- Harmonic drive vs. worm gear: Traditional worm gear mounts (HEQ5 Pro, EQ6-R) are proven and serviceable. Harmonic drive mounts (Rainbow Astro RST-135, iOptron HEM27) offer zero backlash, extreme compactness, and payload-to-weight ratios that transform travel astrophotography with compact astro imaging telescopes.
- Polar alignment precision: Sub-arcminute polar alignment is required for multi-hour imaging runs without field rotation. SharpCap, PoleMaster, and built-in polar alignment tools in modern mounts achieve this in under five minutes — a prerequisite for any serious astro imaging telescopes session.
- GoTo accuracy and plate-solving: Modern mount GoTo accuracy of 2–5 arcminutes is insufficient for blind acquisition with narrow-field astro imaging telescopes. Plate-solving through N.I.N.A., Sequence Generator Pro, or KStars with EKOS identifies the actual pointing position from the image itself, correcting GoTo errors to under 5 arcseconds automatically.
Sensors and Cameras: Matching Detector Technology to Astro Imaging Telescopes:
The camera behind astro imaging telescopes is not the telescope — it is the detector. Knowing what each detector type demands from the optical system prevents mismatched investments that waste both the sensor’s capability and the telescope’s optical quality.
Modern astrophotography uses three primary detector categories: cooled monochrome CMOS, cooled color CMOS, and uncooled modified DSLRs. Each interacts differently with astro imaging telescopes in ways that affect focal ratio requirements, filter choices, and total integration time needed.
1: Cooled Monochrome CMOS: The Highest Performance Path
Cooled monochrome sensors — the ZWO ASI2600MM Pro, the QHY600M, the Player One Poseidon-M — reach their full capability only through narrowband imaging with Hydrogen-alpha, Oxygen-III, and Sulfur-II filters. With a narrowband filter blocking everything except an 3–7nm bandwidth of emission, cooled monochrome sensors on astro imaging telescopes can image from severely light-polluted sites with effectively no sky-glow penalty. The tradeoff: three separate filter passes are required for RGB color reconstruction, tripling the total integration time per target. Fast astro imaging telescopes at f/4.5–f/6 are specifically recommended for narrowband monochrome work — the speed compensates for the narrow filter transmission.
2: Cooled Color CMOS: The Practical All-Rounder
The ZWO ASI2600MC Pro and QHY268C represent the current standard for cooled one-shot color astrophotography. A Bayer color matrix over the sensor captures all three color channels simultaneously — simpler workflow, faster color completion, but with the inherent two-stop light loss from the Bayer filter. These sensors pair ideally with astro imaging telescopes in the f/5–f/7 range: fast enough to accumulate adequate signal per subframe but not so fast that optical aberrations exceed the sensor’s resolution at the pixel level. The 26-megapixel IMX571 chip in the ASI2600 series is currently the most popular sensor in consumer astrophotography, and virtually every astro imaging telescope manufacturer has optimized backfocus distances to accommodate this camera specifically.
3: Modified DSLRs: The Entry-Level Bridge to Dedicated Astro Cameras
A Canon or Nikon DSLR with the internal UV/IR cut filter removed — either by a professional modification service or a trusted DIY process — becomes a capable astrophotography camera for a fraction of the cost of dedicated astro cameras. DSLRs are uncooled, meaning thermal noise increases significantly during summer sessions, and their native sensors are less sensitive to hydrogen-alpha emission than dedicated astro cameras. But paired with a quality astro imaging telescope at f/5–f/6 and a narrowband clip filter, a modified Canon EOS Ra or modified 6D produces scientifically useful results — the entry point for serious astro imaging without the cost of dedicated cameras.
Top Astro Imaging Telescopes Ranked by Use Case in 2025:
Selecting among astro imaging telescopes requires knowing which instruments lead each use-case category in the current market. Here are the five dominant categories ranked by real-world usage frequency among US-based astrophotographers:
- Wide-field emission nebulae (250–420mm FL): William Optics Redcat 51 (250mm, f/4.9), Askar 107PHQ (700mm, f/6.5), and Skywatcher Evostar 72ED (420mm, f/5.8) lead this category — portable, well-corrected, paired with compact harmonic mounts for travel-ready systems.
- Medium-field galaxy imaging (600–1,000mm FL): William Optics GT81 (478mm, f/5.9) with focal extender, Skywatcher Esprit 100ED (550mm, f/5.5), and Askar 103APO (700mm, f/6.8) — the aperture and focal length combination that resolves galaxy structure while maintaining manageable field of view.
- Narrow-field galaxy and planetary nebula (1,200–2,000mm FL): Celestron EdgeHD 8 at f/7 (1,422mm), Astro-Tech AT8RC (1,625mm), and Planewave CDK12.5 (2,541mm) — demanding collimation and mount precision but capable of resolving details invisible to shorter focal length astro imaging telescopes.
- Dedicated solar imaging (with Herschel wedge or dedicated H-alpha): Lunt LS60THa and Coronado SolarMax III define this niche — specialized astro imaging telescopes for solar prominences and surface granulation.
- Compact travel systems under $800 (OTA only): Skywatcher Evostar 72ED, Redcat 51, and Askar 32mm mini astrograph — instruments small enough for airline travel that still produce exhibition-quality wide-field results.
Reference Table:
| Astro Imaging Telescope | Aperture | Focal Length | F/Ratio | Design | Sensor Coverage | US Price (OTA) | Best Target Category |
| William Optics Redcat 51 | 51mm | 250mm | f/4.9 | APO Petzval | Full-frame | $599 | Wide nebulae, Milky Way |
| Skywatcher Evostar 72ED | 72mm | 420mm | f/5.8 | ED Doublet | APS-C/Full-frame | $399 | Wide nebulae, clusters |
| Askar 107PHQ | 107mm | 700mm | f/6.5 | APO Quadruplet | Full-frame | $1,499 | Medium nebulae, galaxies |
| William Optics GT81 | 81mm | 478mm | f/5.9 | APO Triplet | Full-frame | $799 | Wide-medium deep sky |
| Skywatcher Esprit 100ED | 100mm | 550mm | f/5.5 | APO Triplet | Full-frame | $1,299 | Deep-sky all-rounder |
| Celestron EdgeHD 8 | 203mm | 2032mm (f/7 reduced: 1422mm) | f/10 (f/7) | SCT Aplanatic | Full-frame (reduced) | $1,299 | Galaxies, planetary neb. |
| Astro-Tech AT8RC | 203mm | 1625mm | f/8 | Ritchey-Chrétien | APS-C | $799 | Galaxies, tight clusters |
| Planewave CDK12.5 | 318mm | 2541mm | f/8 | CDK Aplanat | Full-frame | $9,995 | Research-grade deep sky |
| Skywatcher Esprit 150ED | 150mm | 1050mm | f/7 | APO Triplet | Full-frame | $3,499 | Medium-field imaging |
| Askar 32mm Mini Astrograph | 32mm | 128mm | f/4 | APO Doublet | APS-C | $299 | Ultra-wide, Milky Way arches |
| Lunt LS60THa | 60mm | 500mm | f/8.3 | H-alpha dedicated | APS-C | $1,295 | Solar prominences |
| Orion 8″ Astrograph | 203mm | 800mm | f/3.9 | Newtonian | APS-C | $499 | Fast wide deep sky |
Narrowband Imaging With Astro Imaging Telescopes: The Light Pollution Solution:
Narrowband astrophotography through astro imaging telescopes is the technique that made suburban deep-sky imaging possible — transforming a legitimate handicap into a near-irrelevant variable.
The physics are straightforward. Emission nebulae glow in specific, discrete wavelengths: hydrogen-alpha at 656nm, oxygen-III at 500nm, and sulfur-II at 672nm. Light pollution, sodium vapor streetlights, and LED municipal lighting emit broadband light covering all wavelengths. A narrowband filter — 3nm to 7nm bandpass — passes the nebula’s emission wavelength and rejects essentially all broadband pollution simultaneously. The result: astro imaging telescopes under Bortle 8 city skies capture the same nebula signal as identical instruments under Bortle 3 dark skies, with sky background reduced by a factor of 100 or more.
1: Filter Selection for Different Astro Imaging Telescopes Configurations
One-shot color cameras (OSC) use dual-narrowband filters — the Optolong L-eXtreme or Antlia ALP-T — that simultaneously pass hydrogen-alpha and oxygen-III wavelengths through a single filter. This simplifies the workflow and keeps image session time equivalent to broadband imaging while achieving light-pollution suppression. The resulting images render with a false-color palette (Hubble Palette: SII=Red, Ha=Green, OIII=Blue) or a natural emission palette. Monochrome cameras use individual Ha, OIII, and SII filters in a filter wheel — more complex, but with full independent control over each channel’s exposure time and detail level.
2: Optimal Focal Ratios for Narrowband Astro Imaging Telescopes
Narrowband filters are demanding on optical speed. Each stop slower (f/5.6 to f/8 to f/11) doubles exposure time required for identical signal. At f/11, narrowband imaging requires exposures four times longer than f/5.6 for the same sky background limited magnitude — translating to nights of integration instead of hours. This is why serious narrowband imaging consistently gravitates toward fast astro imaging telescopes: the Redcat 51 at f/4.9, the Esprit 100ED at f/5.5, and the Askar 107PHQ at f/6.5 lead narrowband usage statistics in US astrophotography communities precisely because they accumulate signal fast enough to make integration time manageable within realistic observing windows
Collimation and Optical Calibration of Astro Imaging Telescopes: The Maintenance Protocol:
Collimation separates consistently sharp images from sessions spent chasing mysterious soft-star problems. Five non-negotiable calibration principles for astro imaging telescopes:
- Reflectors require collimation before every imaging session after transport: A Newtonian astrograph moved in a car needs collimation check before imaging — mirror cells shift under vibration enough to degrade star quality measurably at the pixel level in a high-resolution camera.
- Tilt in the camera adapter propagates through the entire optical train: Even 0.1mm of tilt in the camera-to-focuser interface creates asymmetric star shapes across the frame — one corner sharp, opposite corner blurred. A quality tilt adapter (Pegasus FocusCube tilt plates, ZWO tilt adjuster) corrects this for flat-field astro imaging telescopes.
- Laser collimators are fast but imprecise for final collimation: A laser collimator gets Newtonian astro imaging telescopes to 95% collimation in two minutes. The final 5% requires a star test at high magnification — looking for symmetric diffraction rings around a defocused bright star — which reveals the collimation precision a laser cannot provide.
- Refractor collimation rarely needs field adjustment: Quality apochromatic astro imaging telescopes arrive factory-collimated and maintain it unless physically stressed. The focuser tilt adjustment matters more than objective cell adjustment in most refractor setups.
- Temperature change affects focus, not collimation: Mirror-based astro imaging telescopes shift focus as temperatures drop — typically 1–3mm of focus travel per 10°C temperature change. An electronic autofocuser with temperature compensation (Pegasus FocusCube, ZWO EAF) tracks this automatically during multi-hour imaging sessions.
Image Acquisition Software for Astro Imaging Telescopes: The Control Layer That Unlocks Full Automation:
Manual astrophotography — manually centering targets, manually starting exposures, manually monitoring focus — is how most imagers begin. It is also how most imagers plateau. Modern image acquisition software turns astro imaging telescopes into automated observatories that run unattended through the night.
The software ecosystem matters more than any single hardware choice because it determines how efficiently each clear hour of sky translates into usable data. Every hour of automation overhead recovered is an hour of additional integration on your target — and integration time is the single most impactful variable in deep-sky astrophotography quality.
1: N.I.N.A. (Nighttime Imaging ‘N’ Astronomy): The Current Standard
N.I.N.A. is free, open-source, and has become the dominant image acquisition platform for Windows-based astro imaging telescopes setups. Its Advanced Sequencer enables multi-night planning: specify a target, integration time per filter, total desired integration across however many nights the target is visible, and N.I.N.A. executes the plan autonomously — slewing, plate-solving, centering, autofocusing at set temperature intervals, dithering between frames to eliminate fixed-pattern sensor artifacts, and pausing automatically when clouds interrupt the sky. For refractor astro imaging telescopes on harmonic drive mounts with electronic focusers, N.I.N.A. reduces the operator to a setup role — configure the sequence once, walk away, review data in the morning.
2: PHD2 Autoguiding: The Tracking Precision Engine
PHD2 is the universal autoguiding application for astro imaging telescopes and it is also free. An off-axis guider or small guide scope mounted alongside the primary astro imaging telescope feeds star positions to PHD2, which calculates mount correction pulses fifty to a hundred times per minute to maintain sub-arcsecond tracking. Properly configured PHD2 — calibrated multistar guiding, aggressive algorithm set to match the mount’s response time — reduces total RMS guiding error to 0.4–0.8 arcseconds on quality mounts. That precision is what enables 5–10 minute subframe exposures through long focal length astro imaging telescopes without star trailing.
3: PixInsight vs. Adobe Photoshop: The Processing Decision
Raw data from astro imaging telescopes requires calibration (dark, flat, and bias frames), integration (stacking individual subframes), and processing (stretching, noise reduction, color calibration). PixInsight is the industry standard for all three stages — its WBPP (Weighted Batch Pre-Processing) script automates calibration and stacking in a single operation. The BlurXTerminator AI deconvolution tool, Starless separation, and GradientCorrection modules address the most challenging processing steps with precision that Adobe Photoshop cannot replicate. The learning curve is steep — plan sixty to ninety hours of practice before PixInsight workflows become intuitive — but the results from well-captured astro imaging telescopes data processed in PixInsight are definitively superior to any Photoshop-based approach.
Thermal and Environmental Management for Astro Imaging Telescopes:
Environmental factors destroy astrophotography data more reliably than any equipment limitation. Dew, thermal gradients, wind vibration, and seeing conditions interact with astro imaging telescopes in specific, preventable ways.
Dew formation on the objective lens or corrector plate ends imaging sessions abruptly and can damage optical coatings through repeated moisture and evaporation cycles. The solution is a dew heater strap controlled by a temperature-differential dew controller (Pegasus Astro Ultimate Power Box, Dew Controller Pro) that monitors the lens temperature relative to ambient dew point and applies just enough heat to stay above the condensation threshold. Significant: too much heat creates thermal turbulence in front of the objective — damaging image quality as effectively as dew itself. The controller’s differential setting matters.
Wind vibration at any magnitude above about 5–8 mph introduces focus trails in long exposures through astro imaging telescopes. A simple windbreak — foam-core boards on the upwind side of the mount — reduces vibration amplitude by 60–70% without affecting thermal equilibration. More aggressive: shield the entire setup with a garden windbreak mesh on a portable frame. Experienced imagers at exposed sites keep these permanently in the back of their transport vehicle.
Seeing conditions — the atmospheric turbulence that creates the twinkling of stars — affects astro imaging telescopes in proportion to focal length. At 250mm focal length, 4-arcsecond seeing is inconsequential — your pixel scale is likely 3 arcseconds anyway. At 2,000mm focal length, the same seeing limits resolution to a fraction of what the optics theoretically resolve. Check seeing forecasts (Meteoblue, Clear Outside, Astrospheric) before imaging sessions with long focal length astro imaging telescopes — poor seeing wastes dark time that could be spent on wide-field targets unaffected by atmospheric turbulence.
Travel Astrophotography With Compact Astro Imaging Telescopes: Gear Selection for Dark Sky Expeditions:
The intersection of travel and astrophotography demands a specific category of astro imaging telescopes that the stationary backyard imager never needs to prioritize: instruments that deliver exhibition-quality results while surviving airline baggage, unpredictable mounting surfaces, and condensed setup timelines.
The current benchmark for travel astro imaging telescopes is the William Optics Redcat 51 — 51mm aperture, 250mm at f/4.9, 750 grams including its dovetail saddle. This instrument fits inside a standard laptop carry-on bag alongside a ZWO ASI2600MC Pro and a harmonic drive mount head. On a dark sky site in Chile, New Zealand, or the Texas Star Party, the Redcat 51 paired with a harmonic drive mount captures the Carina Nebula, Eta Carinae region, the Magellanic Clouds, and the Galactic Center in full detail across two nights of integration. These are images that no amount of observing from mid-latitude US sites can replicate, because the targets physically never rise to observable altitude from most American locations.
The harmonic drive mount is the enabling technology for travel astro imaging telescopes systems. The iOptron HEM27 weighs 4.1 kg including tripod head and counterweights — the equivalent of a traditional mount counterweight alone. The Rainbow Astro RST-135 weighs 3.2 kg. Both track to under 1 arcsecond RMS with autoguiding, carry 12–15 kg of payload, and fold into a carry-on bag. Traditional German equatorial mounts providing equivalent payload and tracking precision weigh 15–25 kg — incompatible with airline travel without checked freight arrangements.
Power for remote travel astro imaging telescopes sessions requires a dedicated lithium battery power station — the Jackery 500 or Bluetti AC50S provide 500Wh of capacity, enough for one full night of dew heater, mount, camera cooler, and laptop operation. Budget 100–150W continuous draw for a full compact astro imaging telescopes system.
Building Your First Complete Astro Imaging Telescopes System: A Budget-Tiered Framework:
Three realistic budget tiers for complete astro imaging telescopes systems in 2025, with specific component recommendations at each level:
Entry tier ($1,200–$2,500 total system): Skywatcher Evostar 72ED or Redcat 51 optical tube, Skywatcher HEQ5 Pro or iOptron CEM26 mount, ZWO ASI533MC Pro cooled color camera, ZWO 30mm guide scope with ASI120MM Mini guide camera, PHD2 autoguiding, N.I.N.A. acquisition — a complete system capable of producing publishable deep-sky images of bright emission nebulae from suburban or dark-sky sites. Limitations: smaller sensor, less total aperture, less mount payload headroom for future upgrades.
Mid tier ($4,000–$8,000 total system): Skywatcher Esprit 100ED or Askar 107PHQ optical tube, iOptron CEM60 or Skywatcher EQ6-R Pro mount, ZWO ASI2600MC Pro cooled color camera or ASI2600MM Pro with filter wheel and Antlia narrowband filters, off-axis guider with ZWO ASI174MM guide sensor, Pegasus Power Box for dew control and USB management — a system competitive with university-level imaging outputs for extended emission nebulae and medium-field galaxy targets.
Advanced tier ($12,000+ total system): Planewave CDK12.5 or Skywatcher Esprit 150ED, Planewave L-350 or 10Micron GM2000HPS mount, ZWO ASI6200MM Pro or QHY600M monochrome camera, five-position motorized filter wheel with Chroma 3nm narrowband filters, Pegasus Ultimate Power Box, dedicated imaging computer running N.I.N.A. with automated meridian flip, autofocus, and plate-solving — a system that routinely resolves objects at the theoretical diffraction limit of the optics under excellent seeing.
FAQ’s:
What is the best astro imaging telescope for beginners under $500?
The Skywatcher Evostar 72ED at $399 delivers flat, corrected fields on APS-C sensors without additional accessories.
Do astro imaging telescopes require a computerized GoTo mount?
Not required, but plate-solving software with a basic GoTo mount outperforms manual pointing for consistent target acquisition.
What focal length works best for astro imaging telescopes targeting galaxies?
Focal lengths between 600mm and 1,500mm resolve galaxy structure while fitting most galaxies on APS-C and full-frame sensors.
Can a modified DSLR work with astro imaging telescopes for beginners?
Yes — a modified Canon DSLR with a 72ED or similar f/5–f/6 astrograph produces excellent emission nebula results.
How important is aperture in astro imaging telescopes compared to focal ratio?
Focal ratio determines imaging speed; aperture determines resolution limit — both matter, but fast focal ratio often impacts beginners more immediately.
Conclusion:
Astro imaging telescopes reward systematic, informed selection above any other approach. Calculate your pixel scale first, match focal length to target angular size second, and choose the optical design that fits your imaging goals third. Invest in mount quality before optical upgrades — tracking precision determines image sharpness more than aperture. Start narrowband early. Every clear night compounds into an image archive worth building.